Oregon is one of the best places to grow strawberries, and gardeners in Oregon can choose from several flavorful cultivars, or varieties. If you plan it right, you can pick ripe fruit for your family through most of the growing season.
Strawberries can be enjoyed in home garden soil or container plantings. Ensure success by choosing the right type of strawberry, choosing a cultivar adapted to your site and adopting proper cultural practices.
Gardeners have two production options, depending on the type and cultivar selected:
- In the first option, fruit are produced in a concentrated time period. This option is ideal for freezing berries, or making pies or jam.
- In the second option, harvest is spread over most of the growing season for fresh eating.
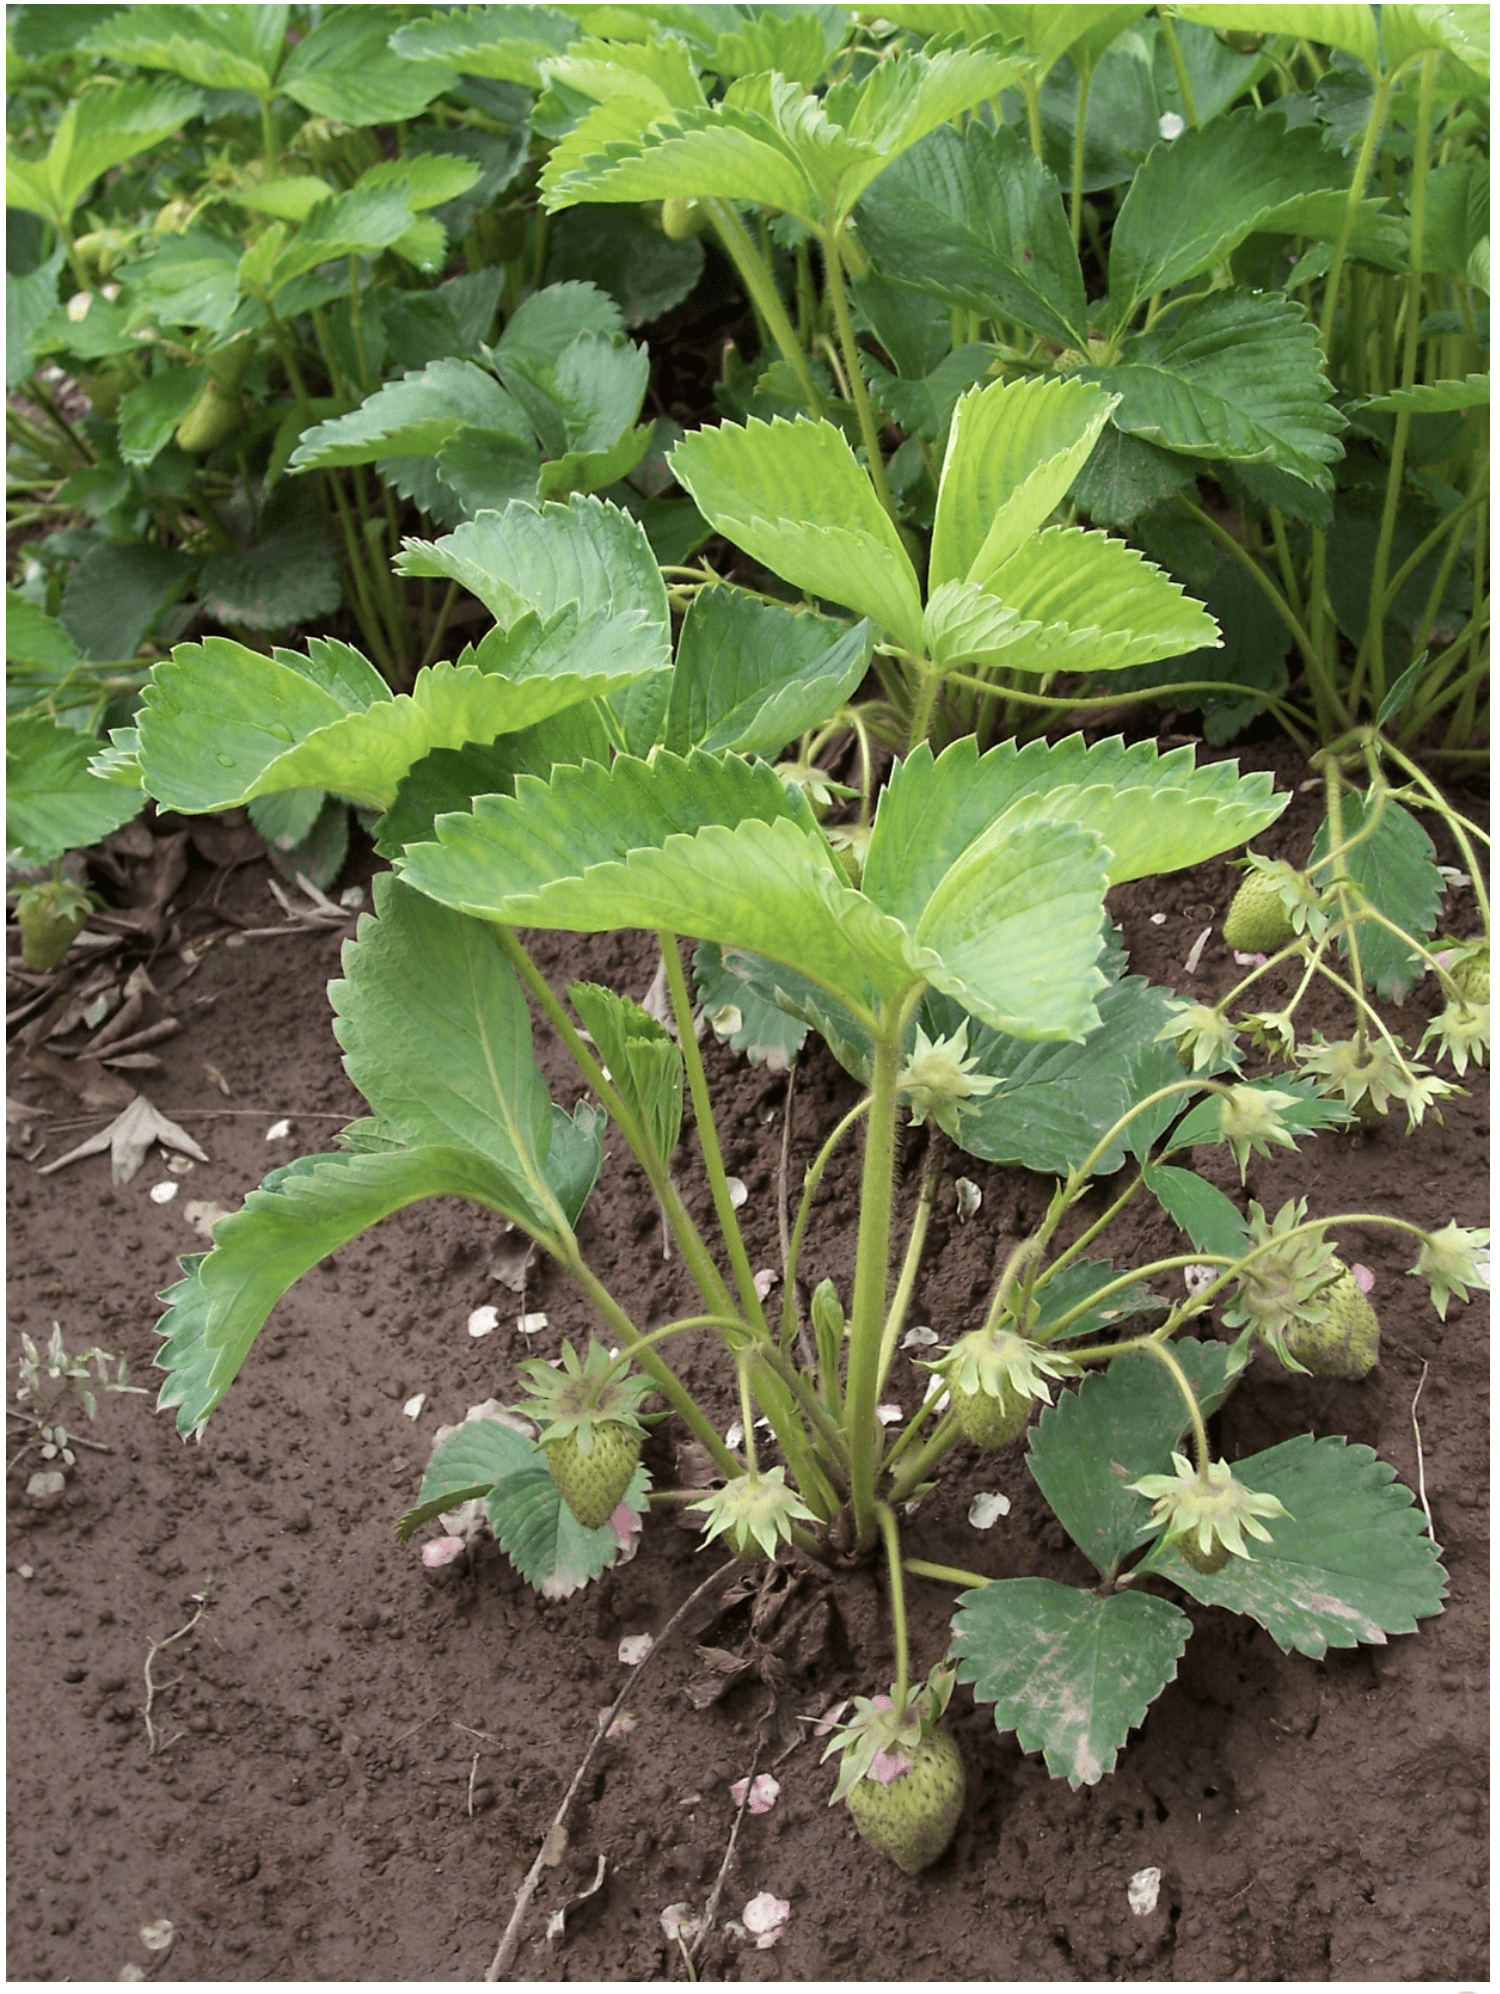
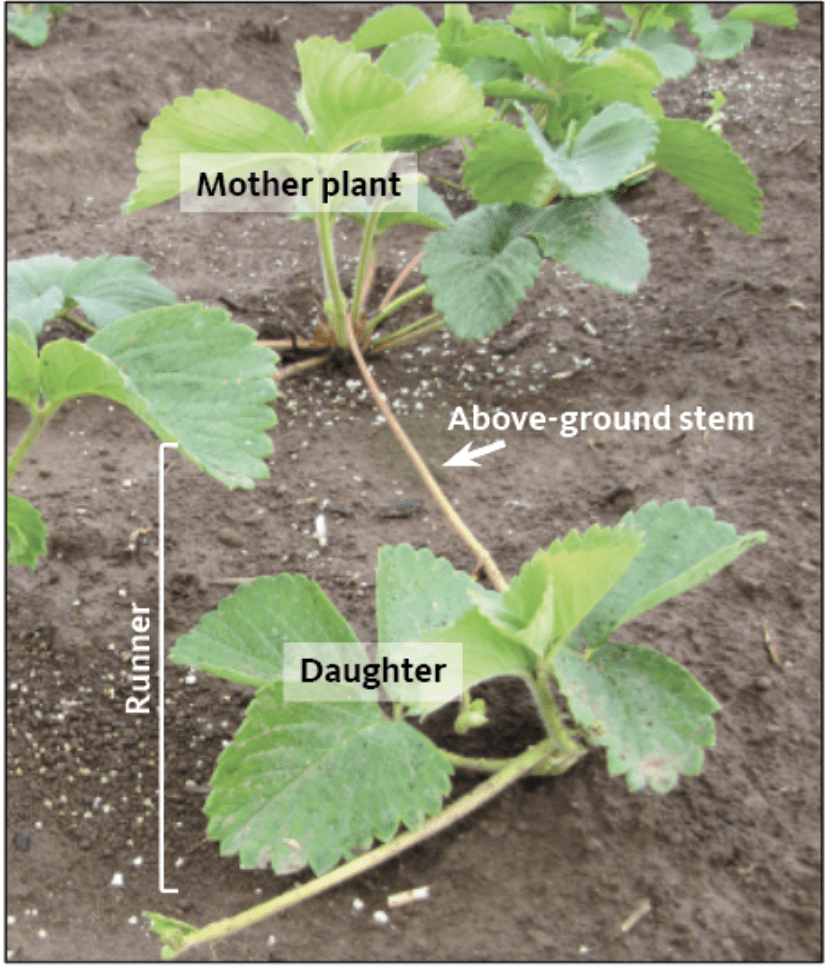
Strawberry plants are low-growing perennials with a short, compressed stem, called the crown. The crown produces a whorl of leaves; flowers and fruit; branch crowns; and runners (Figures 1 and 2). Many strawberry cultivars spread by producing above-ground stems called stolons and new plants called daughters.. The combination of the above-ground stem and any attached daughter plants is called a "runner". Daughter plants will ultimately root when they touch soil (Figure 2). If they do not touch soil or root, they will still grow, but remain dependent upon the original established plant (the "mother"). Daughter plants are used for vegetative propagation by nurseries.
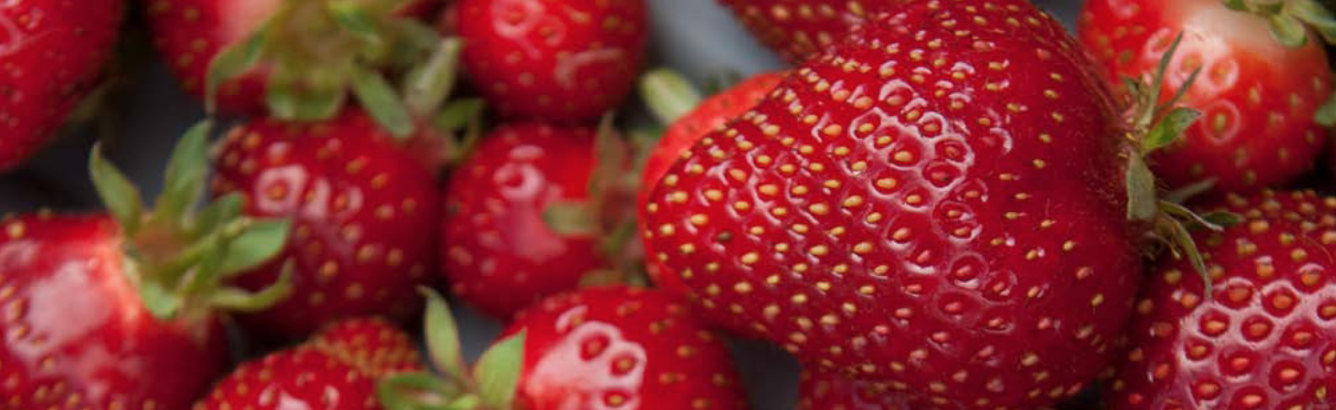
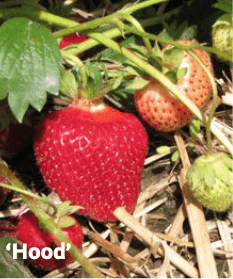
Strawberries do not breed true to type from seed. Strawberry fruit are composed of a fleshy receptacle (the main part you eat) and many achenes (the "seeds" that you see on the surface of the fruit). Fruit are attached to the inflorescence (the structure supporting flowers and fruit) by a stem and calyx, or cap (Figure 3). In cultivars bred from processing, the cap easily pulls off ripe fruit as you pick it. Processing cultivars include 'Hood'. 'Mary's Peak' and 'Sweet Sunrise'.

Strawberry types
Strawberries can be divided into three main types: June-bearing, everbearing and day-neutral. While growing practices for all types are similar, understanding the differences will help you choose the best types for your situation and maximize fruit production.
- June-bearing strawberries produce one fruit crop per year in late spring or early summer (generally in June in the Willamette Valley, although harvest in eastern Oregon may be as late as July). The fruiting season usually lasts around four weeks. They fruit for the first time the year after planting. June-bearing cultivars produce the most runners, making them best adapted to a matted row planting system (see “Planting systems”). These are a good choice if you want a lot of fruit at once to freeze or make jam.
- Everbearing strawberries produce fruit twice a year, once during the June-bearing season and then again in late summer. They will produce a late-summer crop in the planting year but produce few runners. Everbearers are less desirable than day-neutral cultivars in most regions because they are not as productive and do not fruit all season long.
- Day-neutral strawberries produce fruit throughout the growing season, except when it is too cool (less than 40ºF) or too hot (90ºF or higher). When it is too hot, flowers do not form until temperatures drop. In the Willamette Valley, cultivars generally fruit from May through early October. In central Oregon, day-neutral cultivars will generally fruit from late June through October (or the first hard frost). Day-neutrals will fruit for the first time in the same year they were planted. They are ideally planted in containers or in the soil in a hill system (see “Planting systems”), because they produce relatively few runners. Growing the plants in a container, a wood-sided raised bed, or raised beds made from mounded soil makes frequent picking easier. Retailers often include day-neutral cultivars with “everbearing” types, creating confusion. It helps to know the names of the cultivars within each type before you buy.
Strawberry cultivars
It is important to choose a cultivar adapted to your region. Various types of strawberry differ in fruiting season and cultural requirements. Even cultivars within the same type differ in fruit quality, flavor, appearance, tolerance to pests, cold hardiness, plant longevity and processing characteristics.
Winter cold-hardy cultivars adapted to the colder regions of Oregon (zones 5 to 7), may not grow normally in regions of the Willamette Valley (zone 8, for example) where winters are warmer and plants receive less winter chill. Also, cultivars adapted to the Willamette Valley may lack sufficient cold hardiness for central, eastern, and southeastern Oregon. You can protect cultivars in cold winter periods by bringing those in containers inside. Cover in-soil plantings with a protective, insulative mulch in winter (see “Common problems”).
Cultivars in Table 1 are noted for good flavor and pest resistance. The table lists a range in Plant Hardiness Zones to help determine regional adaptation if you are growing in an area with a borderline USDA Plant Hardiness Zone. Cold hardiness zones vary within any one region. You may be in zone 5 because your home is at a higher elevation, while the majority of the region is in zone 6. It’s important to choose a cultivar adapted to your needs and your site.
Table 1. Suggested cultivars
Everbearers: two crops per season
- ‘Quinault’: Zones 4–9
- ‘Ozark Beauty’: Zones 3–9
- ‘Fort Laramie’: Zones 3–7
Day-neutrals: continuous production
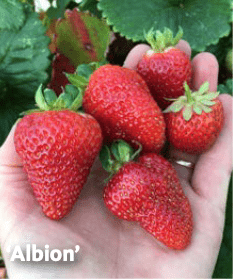
- ‘Albion’: Zones 4–8
- ‘San Andreas’: Zones 4–8
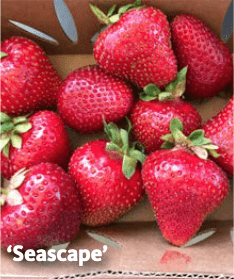
- ‘Seascape’: Zones 4–8
- ‘Sweet Ann’: Zones 4–8
June-bearers: one crop per season
- ‘Sweet Sunrise’: Zones 6–9
- ‘Mary’s Peak’: Zones 6–9
- ‘Hood’: Zones 6–9
- ‘Benton’: Zones 6–9
- ‘Shuksan’: Zones 4–9
- ‘Puget Summer’: Zones 3–9
- ‘Puget Reliance’: Zones 3–9
- ‘AC Valley’: Zones 4–7
- ‘AC Wendy’: Zones 3–8
- ‘Allstar’: Zones 4–8
- ‘Annapolis’: Zones 3–8
- ‘Archer’: Zones 4–8
- ‘Earliglow’: Zones 4–8
- ‘Jewel’: Zones 4–8
- ‘Honeoye’: Zones 3–8

For more information, see Strawberry Cultivars for Western Oregon and Washington, EC 1618, or Selecting Berry Crop Varieties for Central Oregon, EC 1621.
Whichever types and cultivars you choose, buy only certified, disease-free plants from a reputable nursery. Even though it’s tempting to start a new planting with daughter plants from an old patch, don’t do it. This could introduce pest-infested soil and virus-infected plants to your new planting. Also, many cultivars are patented and may only legally be propagated by licensed nurseries. Many of the listed cultivars (and more) are available through local retail and mail-order nurseries. Plants often sell out quickly, so order well in advance of spring planting.
Because strawberry cultivars do not need cross-pollination to produce fruit, you only need to choose one cultivar. However, growing more than one type or cultivar will allow you to compare them, have sufficient fruit for freezing or jam, and to harvest fruit all season long.
Selecting a site
Strawberry plantings are only productive for three to five years. With careful site selection, you can maximize the quality and quantity of fruit from your plants during that time.
Ideal environmental conditions for strawberries are full sun exposure and fertile, well-drained, sandy loam or clay loam soils with moderate water-holding capacity. Strawberry plants are sensitive to wet or heavy soils and are susceptible to root rot (see “Common problems”). Raised beds or mounded rows, if constructed correctly, can create enough height for adequate drainage (Figures 5 and 6).
Strawberries can be sensitive to winter cold and frost damage in late winter and early spring, so select a site with good air circulation. Frost protection may be necessary in some locations, especially where freeze/thaw cycles are frequent and where high winds are common, such as central Oregon (see “Common problems”)
Soil nutrient testing and modification
If you are going to plant strawberries in your garden soil, take a soil sample and have it tested prior to planting. Collect soil samples up to a year or more in advance. This will provide adequate time to amend the soil, if necessary. Take samples from the top 6 to 12 inches of soil where the strawberry roots will grow.
Strawberries require a soil pH of 5.6 to 6.5. If your soil test indicates that your soil pH is too low (too acidic) or too high (too basic) for strawberry production, you can amend the soil to improve the pH. A typical soil analysis will also include phosphorus (P), potassium (K), calcium (Ca), magnesium (Mg) and sodium (Na). In addition, test for boron (B) and organic matter. Nitrogen (N) levels in soil are not useful because N is not added prior to planting. Instead, supply N with fertilizer after planting. Table 2 shows recommended nutrient ranges for strawberry.
For more information, see A Guide to Collecting Soil Samples for Farms and Gardens, EC 628; Analytical Laboratories Serving Oregon, EM 8677; and Soil Test Interpretation Guide, EC 1478.
| Soil nutrient | Deficient at less than |
|---|---|
| Phosphorus (P): Bray 1 testing method | 45 |
| Phosphorus (P): Olsen testing method | 20 |
| Potassium (K) | 75-175 |
| Calcium (Ca) | 1,000 |
| Magnesium (Mg) | 120 |
| Boron (B) | 0.3-1.0. Lower level for day-neutral; higher for June-bearers |
| Organic matter | >3% |
Adapted from Strawberry Nutrient Management Guide for Oregon and Washington, EM 9234.
Soil that is not ideal for strawberries — soil with the wrong pH, poor drainage or the wrong soil type — can usually be improved by increasing organic matter content, building raised beds, applying amendments to modify soil pH, and modifying soil nutrient levels, if needed.
Soil pH
Willamette Valley soils often require lime amendments to reach the ideal pH for strawberries. You can ask for the Shoemaker-McLean-Pratt buffer (known as SMP) as part of your soil test to find how much lime to apply. In central, eastern, and southeastern Oregon, soils tend to be neutral to more alkaline, so this additional buffer test is probably not necessary.
Ideally, test the soil a year before you plant to give yourself enough time to modify the soil pH, if necessary. If the soil pH is too high (above 6.5), apply elemental sulfur to acidify it. The application rate depends on your soil type and its current pH. In sandy type soils apply approximately 1 to 3 pounds of sulfur per 100 square feet, or in clayey type soils apply approximately 5 to 6 pounds per 100 square feet. For more information see Acidifying Soil for Blueberries and Ornamental Plants in the Yard and Garden, EC 1560, and Acidifying Soil in Landscapes and Gardens East of the Cascades, EC 1585.
In general, if your soil pH is too low (below 5.6) for strawberry production, incorporate finely ground dolomitic limestone at a rate of approximately 5 to 10 pounds per 100 square feet. You can also use high-pH composts to add organic matter and increase soil pH. However, avoid composts with a high salt content (electrical conductivity, or EC), such as fresh animal manures. Incorporate amendments into the soil about a year prior to planting, as it takes time for the soil pH to adjust after the addition of lime. See Applying Lime to Raise Soil pH for Crop Production (Western Oregon), EM 9057, and Eastern Oregon Liming Guide, EM 9060.
Drainage
Strawberries prefer well-drained soil and can benefit from the improved drainage of raised beds. Poor drainage can lead to root death and root diseases. The soil water table should be at least 14 inches below the soil surface. Raised beds made from mounded soil should be about 1 to 1.5 feet high (Figure 5). Strawberry roots will suffocate in soils that are waterlogged for more than a few days in a row during the growing season, and the likelihood of root rot will increase. Almost any soil type is suitable — or can be amended to be made suitable — although plants will be more vigorous and produce more fruit when grown in a well-drained, fertile, loam soil with some water-holding capacity.
Construct raised beds by hilling or mounding soil and organic matter. Pile up an entire row of built-up material if planting multiple plants. Another option is to fill a framed raised bed with potting mix, or a combination of soil and any needed amendments (Figure 6). Organic matter aids in soil aeration, drainage and water- and nutrient-holding capacity. Incorporate organic matter into the soil before planting.

Organic matter
You can increase soil organic matter content by incorporating fine, aged wood chips; sawdust; bark; well-composted manures; or plant-based composts. Composts are the best options for amending native soil in central Oregon.
It is important that whatever material you apply is free of pest insects and weed seeds. Apply organic matter at a rate of 1 to 2 inches deep for each area being planted. All of these organic materials differ in nutrient content, pH, salt content and carbon-to-nitrogen ratio, or C:N, which affects the rate of decomposition. For more information on the use of organic matter in crop production, see Improving Garden Soils with Organic Matter, EC 1561.
Incorporate the organic material into the soil by digging or tilling. Mixing the amendments in well ensures uniformity of soil properties. If you apply large amounts of fresh organic material with a high C:N, such as sawdust, you can aid decomposition by applying approximately 3 ounces of N per 100 square feet (Figure 16). In areas with little summer rain, irrigating the intended planting area will ensure amendments such as lime or sulfur and organic materials react well with the soil.
Eliminate perennial weeds before planting; they are hard to control after planting. Don’t let annual or perennial weeds go to seed, and ensure that any amendments, such as composted yard debris or manures, are free of weed seeds.
Planting systems
Raised beds and container plantings
Strawberries of any type may be grown in raised beds constructed with wooden frames (Figure 6). Fill these raised beds with potting mix, or a combination of soil and any needed amendments and use the same cultural practices as for soil plantings. For more information on building raised beds, see Raised Bed Gardening, FS 270.
While you can grow all types of strawberry in pots or containers, day-neutral cultivars are best suited for container growing. Day-neutrals fruit almost continuously from mid-spring to autumn frost, and they don’t produce many runners. Choose containers 10 to 18 inches deep and 12 inches or larger in diameter (depending on the number of plants per pot) to allow for sufficient root production. It’s tempting to grow strawberries in hanging baskets, but be sure to remove any runners. These daughter plants, unable to root over the edge of the pot, would never become self-sufficient and would weaken the mother plant. In fact, runners need to be removed from any potted plant (Figures 7A–D).
You can plant up to four strawberry plants per 12-inch diameter pot (Figure 7A). Generally, “strawberry planters” sold in many nurseries are only suitable for one growing season due to limited space for each plant; purchase new plants each spring for use in these planters.

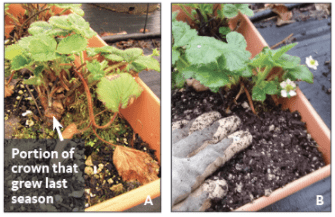
The larger the container, the more likely the plants can be kept for more than one growing season. Strawberry crowns will increase in length over the season. If you leave some room for upward growth in the pot, add soil at the beginning of the second and third growing seasons to renew the plants; take care not to bury the growing point at the top of the crown (Figures 8A–B).
It is important that the potting mix and the container drain well. A recommended soil mixture is one part perlite, one part finely ground bark and two parts garden or potting soil; yard centers may sell a similar mix in bulk. If desired, mix slow-release (sulfur-coated) fertilizer into the potting mix at a rate of 8 cups per cubic yard of potting mix.
Matted row system
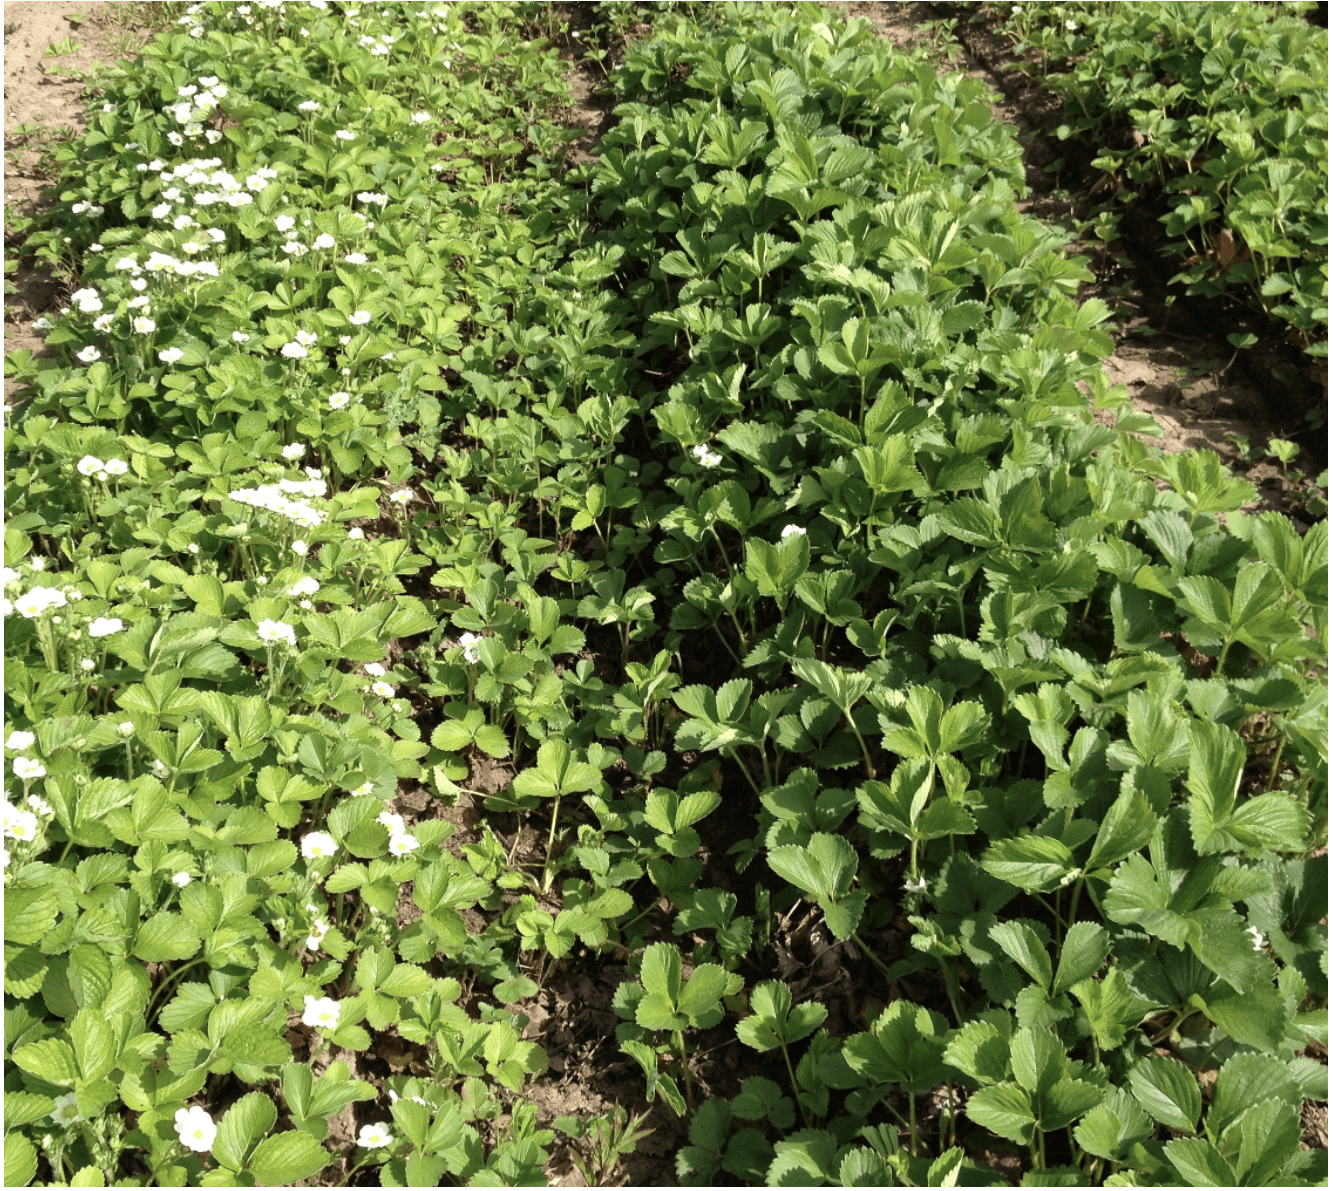
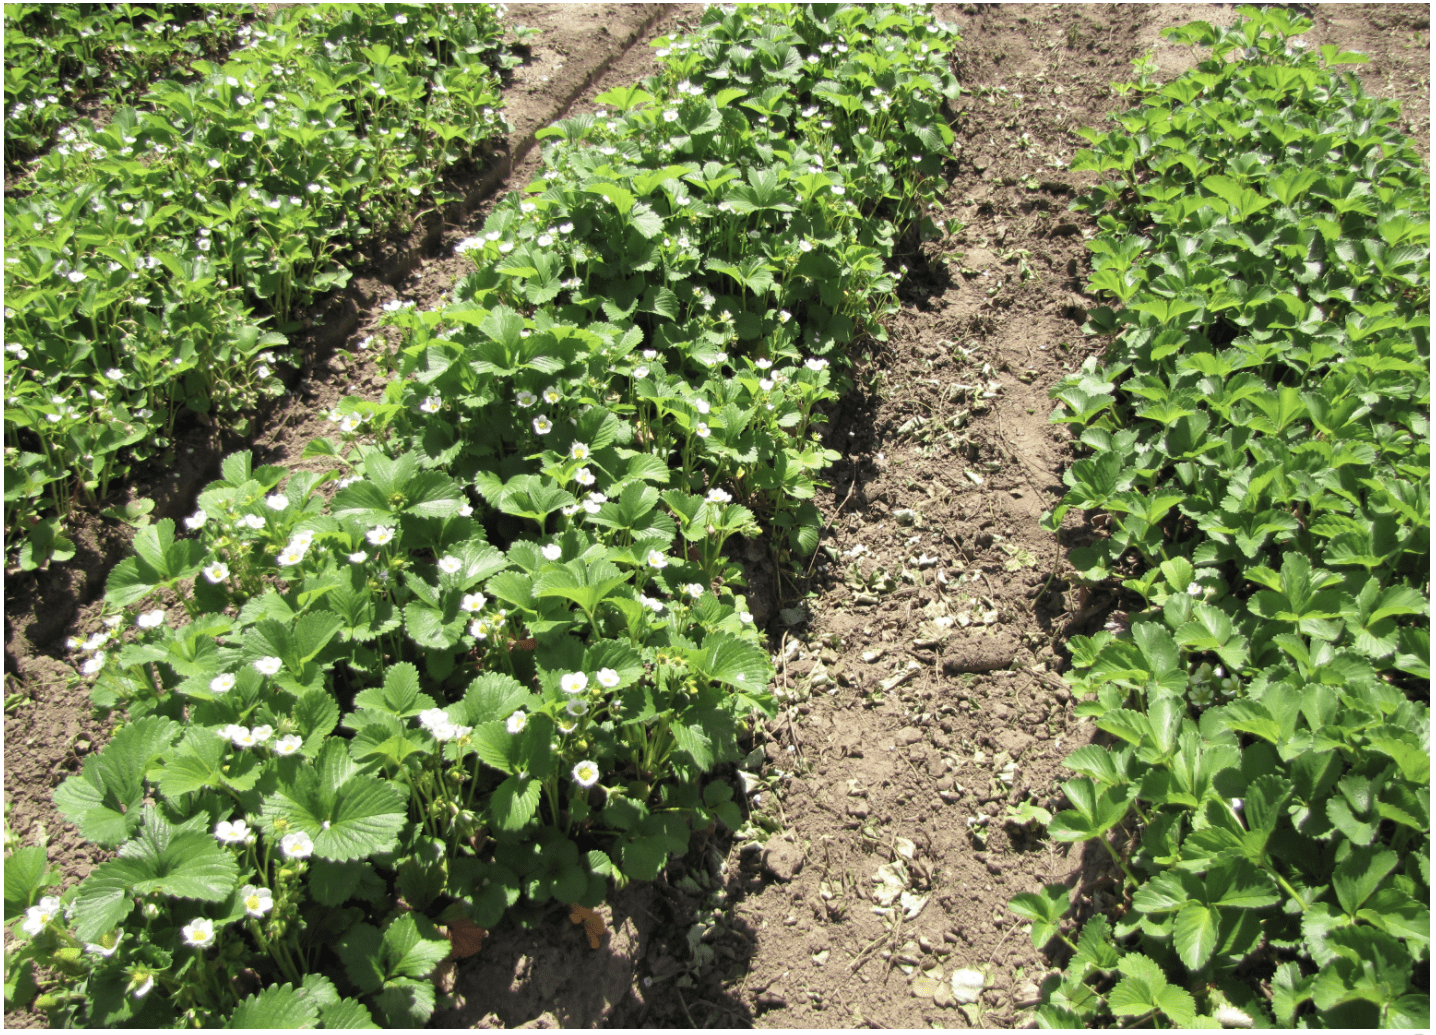
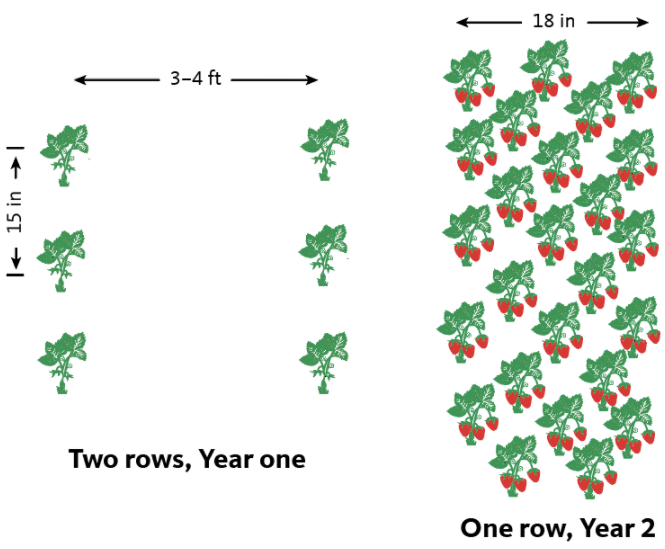
A matted row system is the ideal planting system for June-bearers. Build rows on flat ground or on raised beds that are 3 to 4 feet apart from center to center. Set plants about 15 inches apart in the row (Figure 9A, Figure 10). Early runners (formed before Sept. 1) should be allowed to grow and root. To ensure that they don’t root in the aisles or off the edge of the raised bed, sweep them into the row or bed area before they root to maintain a row width of 12 to 18 inches. Once the daughter plants root, the above-ground stem will naturally die.
Flower bud development in June-bearing strawberry plants occurs in late summer for the next year’s crop, so late-rooted runners are not as productive as early-rooted ones, as they have less growing time before the flowers initiate. Remove late runners to keep the aisle clear in fall or hoe or till the aisles in spring to remove these unproductive daughter plants and to maintain the matted row and aisles (Figures 9B, 9C). To remove runners by hand, cut the above-ground stem before the daughter plants root (see “Hill System,” below), or wait until daughters root and hoe them from the aisles. Because runners are encouraged and need to root in the row, don’t use plastic mulch in the matted row system.


Hill system
In this system, plants are maintained as individuals by removing runners, so cultivars that produce fewer runners, like day-neutrals, are ideal. However, June-bearers can also be grown in a hill system, provided the runners they produce are removed. Plants in the hill system may be grown on flat ground or raised beds in the soil or in containers. Aisles between rows or raised beds should be 1.5 to 2 feet wide. Set plants 12 to 15 inches apart, with two or three lines of plants in each row; stagger the plants (Figure 11, Figure 12). Remove all runners every two to three weeks. Wait until the runners have formed daughter plants with two to three leaves, but haven’t rooted yet. If you remove runners by cutting the above-ground stems before they have formed daughters, it is likely that the plant will increase runner production.

Planting
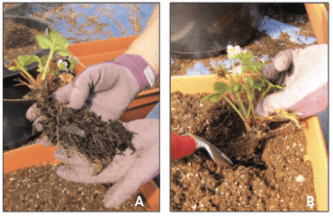
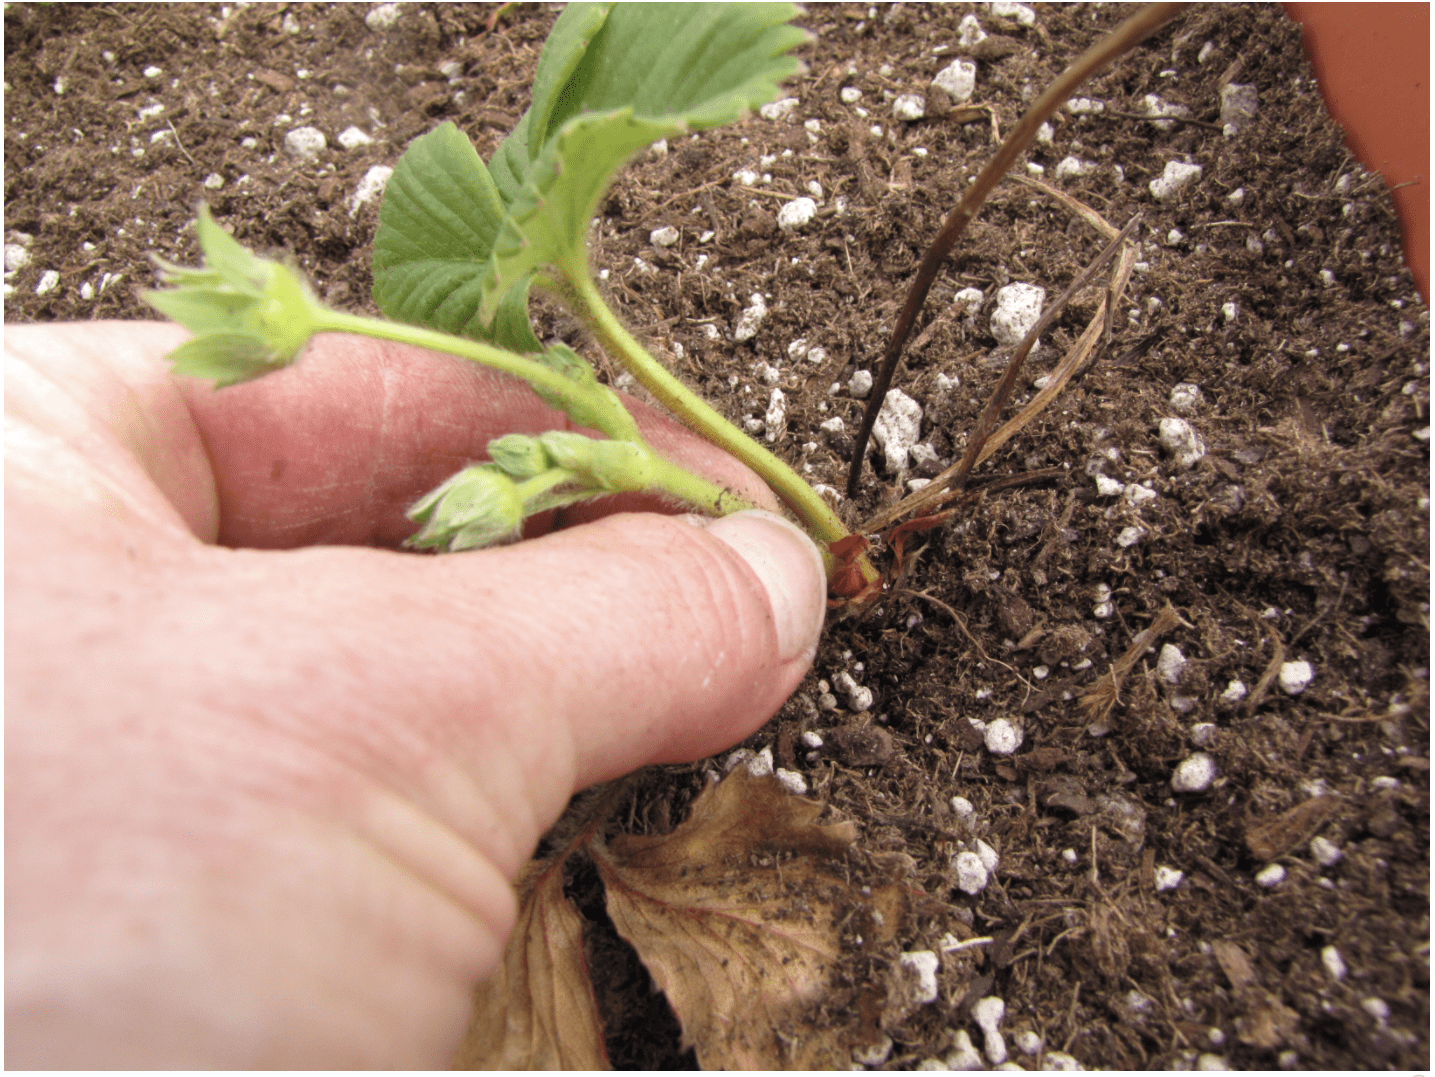
Plant strawberries as early as you can work the soil in spring. Planting depth is important (Figure 13). For bare-root plants, dig a hole for each plant large enough to accommodate the roots without bending them (Figures 14A, 14B). Spread the root mass and ensure the midpoint of the crown is level with the soil surface; the topmost root should be just below the soil surface and not exposed to air, even after a good irrigation. Set container plants at the same depth as the container medium. If you set plants too low, the growing tip at the top of the crown may be smothered and rot. Cover roots or areas around the container plant with soil and press firmly to remove air pockets. Water the plants to settle the soil and check to make sure planting depth is still good; adjust if needed.
June-bearers produce very little fruit in the planting year, and no flower pruning is necessary. However, because everbearers and day-neutrals form new flower buds after planting and produce fruit in the planting year, it is important to remove the first inflorescence (flower stem) as it emerges on the new plants; do this in soil or container plantings (Figure 15). This ensures that the plants will grow roots, crown and leaves prior to forming flower buds. This is important when planting bare-root or container plants.
All types of strawberry will be in full production the next year (Year 2) and generally are productive for two to four fruiting seasons (two to five full years in the ground). Start your new patch in the year of your existing patch’s last fruiting season, so you won’t skip a year of production. This also ensures crop rotation to minimize soilborne pests (see “Common problems”).
Mulching
A mulch can help control annual weeds, conserve soil moisture and — depending on the type of mulch — provide a source of nutrients. Be careful not to bury the strawberry crowns with an organic mulch, as this can lead to crown rot or plant death. Don’t use deep straw as a mulch during the growing season because it buries the crowns and can lead to increased vole, field mice or other rodent activity, which can damage the plants. Deep straw can also harbor slugs, which love the fruit.
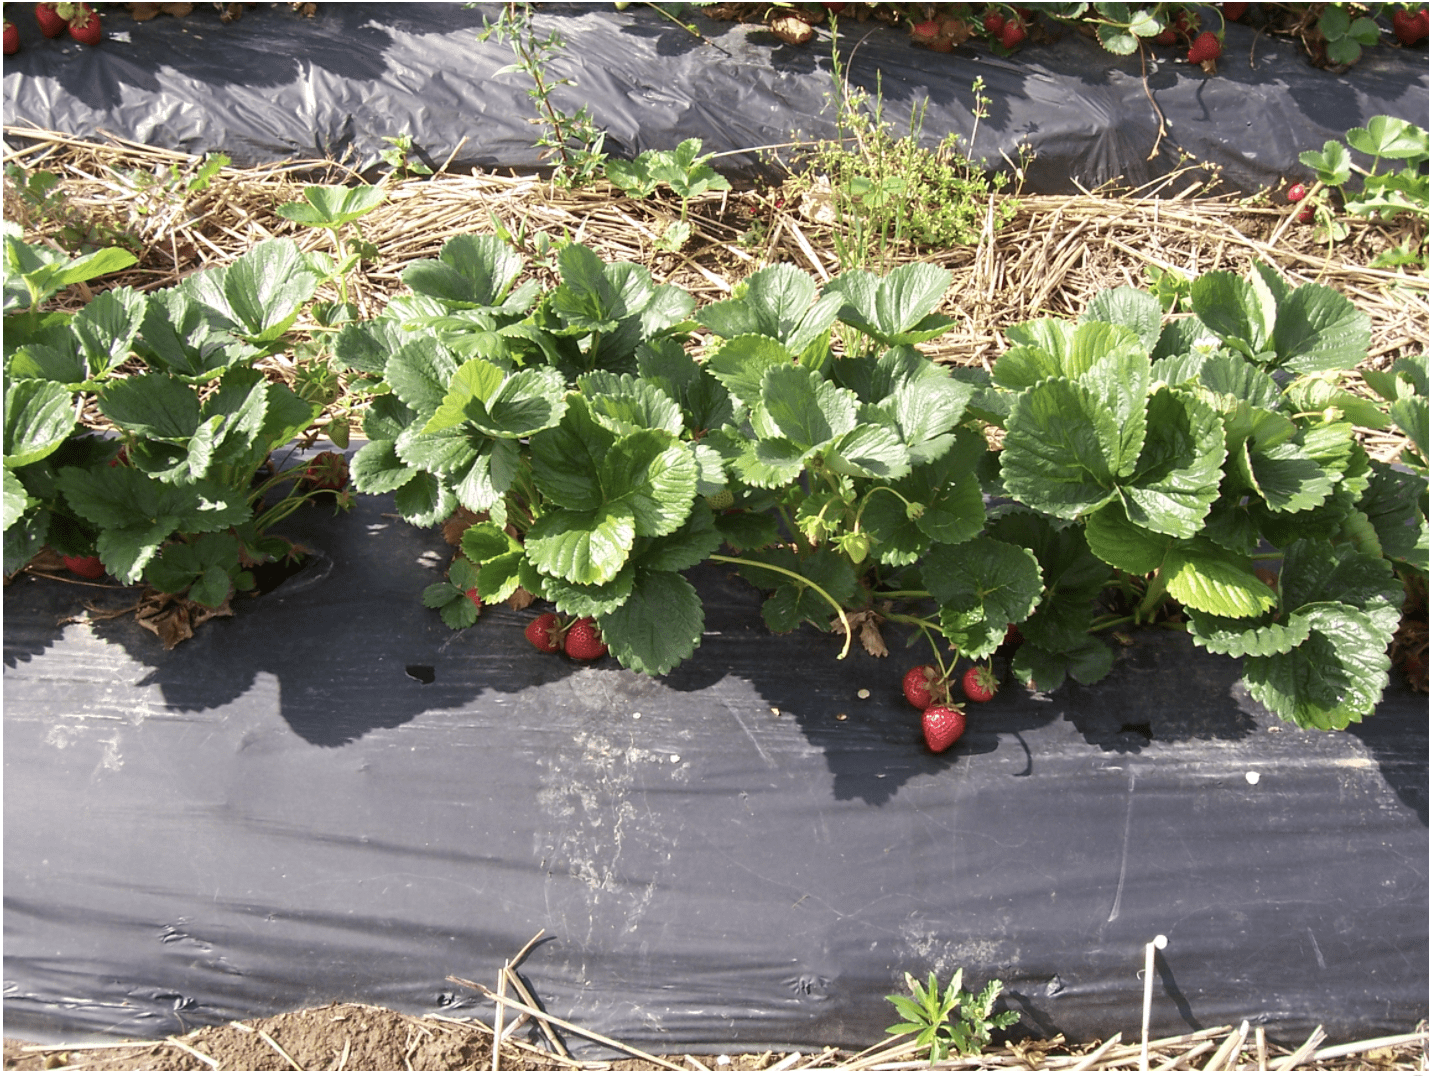
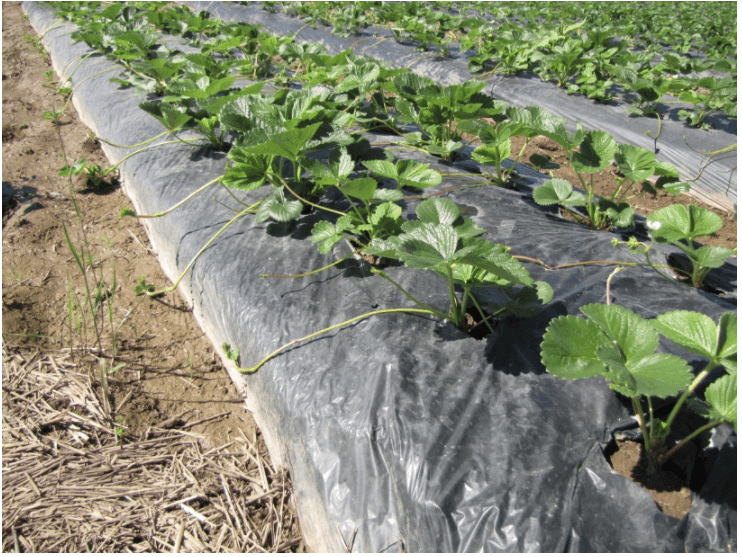
Black plastic is commonly used as a mulch for strawberries grown in the hill system (Figure 12). It cannot be used in the matted row because daughter plants need to root in this system. Apply the plastic just before planting, placing it over the row or the entire raised bed if mounded from soil, overlapping the edges. Stake down the edges or use soil to hold them down. Cut an “X” or a 6–inch-diameter circle in the plastic where each plant will be set, and plant through the holes. You can also lay down the plastic just after you plant and feel for the plants under it. Carefully cut holes where you feel the plants.
When growing on plastic, it’s important to remove any runners that form so the mother plants grow well. It is best to irrigate under the plastic mulch using a drip system. However, you can hand water or use overhead irrigation, if there is enough room around plants that is not covered by plastic so that water can penetrate to the roots. Voles, field mice and slugs may hide under plastic mulch.
Irrigating
Strawberries need adequate water to thrive, either from irrigation or rainfall. Fruit is made up of mostly water, so sufficient irrigation during fruit production is essential for the best yields and fruit quality. Established strawberries typically require from 1 to 1.5 inches of water per week during the growing season, depending on plant vigor, stage of growth, soil type and weather. Whether you’re irrigating by hand or using sprinklers or drip systems, monitor your irrigation carefully to ensure the root zones of the plants receive enough water.
With each irrigation, wet the soil to a depth of 0.5 to 1 foot. The rooting area should be wet enough that the soil does not fully dry out between irrigation cycles. Sandy soils require more frequent and lighter water applications than heavier soils. Newly set plants do not have well-developed root systems, so plants can be easily stressed. Irrigate several times a week or as needed so that the root zone and soil are thoroughly wetted but standing water does not accumulate. You can dig down into the soil to check if the soil is wet — but not too wet — between irrigations and is wet down to 0.5 to 1 foot. Surface mulch can help conserve soil moisture. (See “Mulching.”)
Drip irrigation is ideal for strawberry production because it can reduce disease and weed problems and conserve water. Irrigate with a single line of drip irrigation per row with ½-gallon emitters spaced every 12 inches. You may also use a soaker hose, provided you monitor soil moisture to ensure the proper amount of water is being applied. Place the hose or drip line under any plastic mulch.
Fertilizing
Strawberry plants that have sufficient nutrients are growing well and have healthy green — not pale green or yellow — leaves. Your strawberry plants will need fertilizer in the planting and establishment years.
There are many types of solid (granular) and liquid inorganic and organic fertilizers available. Most all-purpose garden fertilizers or organic products contain phosphate (P source) and potash (K source) as well as nitrogen (N). Some, such as feather meal, also contain calcium (Ca). Fertilizer sources range considerably in their nutrient content. For example, common inorganic fertilizers available for the home garden include 16–16–16 (16% each of N, phosphate and potash), 20–20–20 and various slow-release sulfur coated urea products.
Organic sources include cattle manure (0.6–0.4–0.5) and horse manure (0.7–0.25–0.6), yard-debris compost (1–0.2–0.6), cottonseed meal (6–7–2), feather meal (12–0–0), bone meal (2–15–0), and fish emulsion (3–1–1). Avoid using fresh manure products after planting, as this may be a food safety risk.
The main nutrient needed by strawberry plants after planting in all home garden soils is N. Depending on the type of fertilizer product, there are different application methods to ensure maximum availability of N to the plants. Inorganic granular fertilizers are often applied in equal portions, or splits, throughout the spring and summer to ensure maximum efficiency of plant uptake and minimize the risk of salt stress to the strawberry plants. Granular organic fertilizers such as feather, soybean or cottonseed meals require longer periods of time for N to be available. Therefore, it’s best to apply granular organic fertilizers about a month before inorganic fertilizers would be applied.
Liquid inorganic and organic fertilizers are available relatively quickly to plants but may also move out of the root zone quickly. So, for liquid fertilizers, divide the total amount of N into smaller, more frequent applications, such as weekly (see below).
Fertilizer recommendations for N are given in weight of actual N per length of row for the year. The amount of fertilizer to apply depends on the percentage of N in the product. To calculate how much N to apply during the year, divide the amount of N you need by the percentage of N in the fertilizer (Figure 16). For example, if the recommendation is to apply 2 ounces of N and you are using 16–16–16 fertilizer (16% each of N, phosphate, and potash), the calculation would be 2 ounces ÷ 0.16 (the decimal equivalent of 16%), or 12.5 ounces of the fertilizer product. In another example, if you wanted to use soybean meal (6–2–1) you would need about 33 ounces, or 2.1 pounds of product (2 ounces ÷ 0.06).
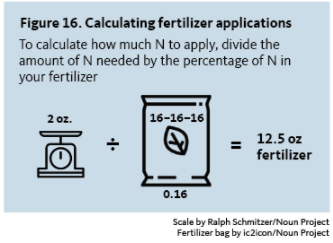
Table 3. Fertilization rates for new plantings (all types) in garden soil (Total nitrogen per 10 feet of row)
- 0.2 oz 1–2 weeks after planting
- 0.2–0.4 oz 1 month later (mid- to late May in the Willamette Valley)
- 0.1–0.2 oz 2 months after planting (late June in the Willamette Valley)
New plantings
In the first year of establishment, apply a total of 0.5–0.8 ounces per 10 feet of row, depending on region (less fertilizer in areas with shorter growing seasons), soil type (more fertile soils need less fertilizer) and plant growth. Adjust as needed based on growth or plant needs. Do not apply all the fertilizer at once; instead, divide into multiple applications. Recommended rates of N fertilizer and timings are provided in the table below.
Adjust fertilizer amount or rate and timing, depending on how well plants are growing and your growing region. When using organic fertilizer sources, apply the product earlier in the growing season. Make inorganic fertilizer applications more frequently on sandy soil, dividing the total rate into more split applications, or use slow-release products.
Broadcast granular fertilizer over the soil surface in the row, spreading it evenly in an area a little wider than the row width; do this by hand or use a broadcast fertilizer spreader (Figure 2). Apply fertilizer when the plants are dry. Immediately after, remove any remaining fertilizer granules from leaves and crowns by brushing them with a broom or using sprinkler irrigation; this reduces the risk of fertilizer burn.
In raised beds, use a similar rate and timing of applications, but calculate the length of rows you are fertilizing and adjust the rate accordingly. In containers, calculate the amount of N to apply per plant — on average there is about 1 plant per foot of row. Common slow-release garden fertilizers and soluble products (added to water) have recommended rates on their product labels that should work well for strawberry. If you are growing plants in a hill system with a plastic mulch, calculate the rate of N fertilizer to apply per plant (divide the rate per 10 feet of row by 10 to get rate per plant if spaced at 1 foot) and apply fertilizer to the area around each mother plant (in the hole cut into the plastic).
Established plantings
After the planting year, fertilization rates depend on the type of strawberries you are growing.
Do not fertilize your June-bearing strawberries in the spring, unless your planting is not thriving. In weaker plantings, you may fertilize with 0.2 to 0.3 ounces of N per 10 feet of row as plants start to grow in the spring. In well-established plantings, fertilizing in spring increases leaf growth but does not result in more or larger berries. Dense canopies inhibit air movement and can promote fruit rot (see “Common problems”). Instead, fertilize at renovation (see “Renovation” below) after fruit harvest, which promotes growth and more flower bud development for next year’s crop. Refer to the table below for the total rate of N fertilizer to apply. The total rate depends on your region, soil type and the vigor of the planting.
Broadcast the granular fertilizer in one application, spreading it evenly over the row length and width. Irrigate immediately after fertilizing. Follow similar recommendations for June-bearers grown in raised beds, but adjust the rate based on the length of rows planted.
Refer to the table below for the total rate of N fertilizer to apply if you are growing day-neutral cultivars. Again, the rate depends on soil type, region and planting vigor. Because plants are growing and fruiting all season long, you should divide the fertilizer into several applications in early summer. You may consider applying additional N in August, if plant vigor is moderate to good, particularly in sandy soil. Follow a similar course for everbearing cultivars.
Table 4. Fertilization rates for established plantings (second and future years) in garden soil (Total nitrogen per 10 feet of row)
- June-bearing cultivars
- 0.4–0.6 oz, all at once after fruiting, at renovation
- Day-neutral and everbearing cultivars
- 0.1–0.2 oz, each month of three months after spring growth begins (April, May and June in the Willamette Valley)
- 0.1–0.2 oz, August (additional month optional, depending on growing region and plant vigor)
For day-neutrals grown in containers or with a plastic mulch, calculate the amount of N to apply per plant. On average, there is about 1 plant per foot of row. Common slow-release garden fertilizers can be applied once in the spring using either the rate recommended on the label or by calculating the rate per plant based on the percentage of N in the product. These products will indicate how many months the fertilizer is effective (released slowly over three months, for example). Soluble products (added to water) have recommended rates on their product label; these often need to be applied to strawberry plants in containers weekly.
Harvesting
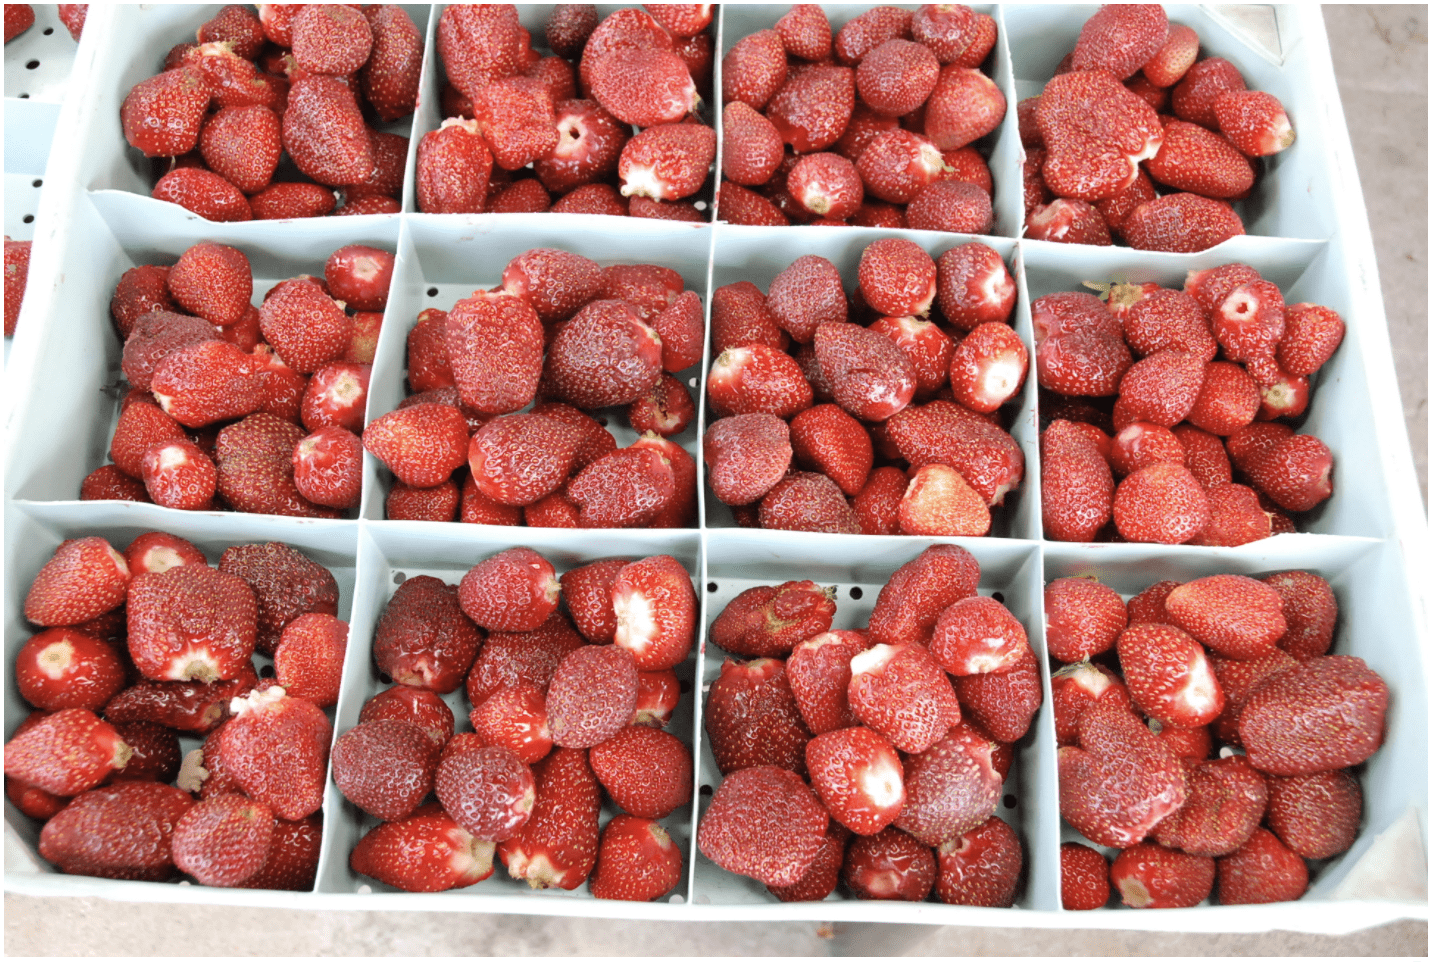
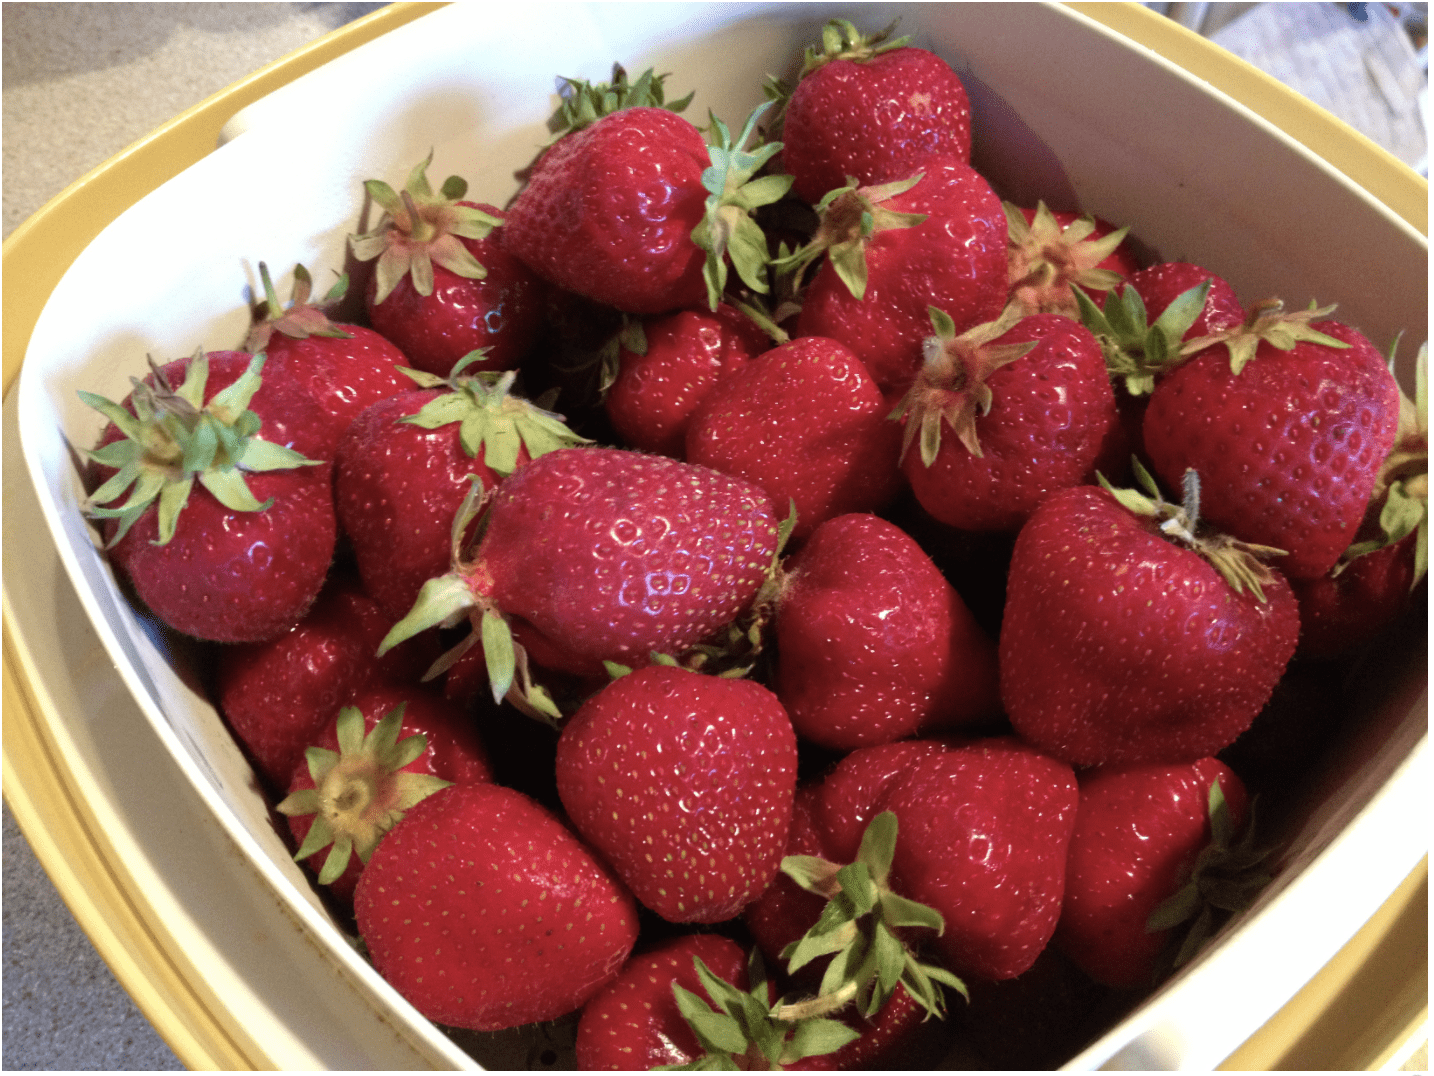
Ripe fruit is fully red. Fruit will store longer if you pick it at 75% red (its color deepens after picking), but flavor is much improved if you leave the fruit to ripen on the plant. Air temperature greatly affects how quickly fruit ripens and how often the plants need to be picked. Check plants more frequently in warmer weather or rain. If an extended period of rain is forecast, pick berries that are 75% red to fully red; rain may dilute flavor and lead to fruit rot. For extended shelf life or storage, pick fruit with the cap, or calyx, on (Figure 3 and Figure 17). However, if you are picking a lot of June-bearing strawberries to make jam or for freezing, cultivars suited for processing are easily picked without the cap when the berries are fully ripe (Figure 4). Just gently pull the ripe fruit toward you, and it will separate from the cap.
Expected strawberry yields are 1 to 2 pounds per plant or 7 to 15 pounds per 10-foot row, although yield varies depending on the cultivar and planting age. The highest yields most commonly occur the year after planting (Year 2). Yield may be similar or lower the following year (Year 3). In all types of strawberry, fruit size and yield will naturally decline from Years 2 to 4.
Once you decide the planting has become less vigorous, with yield and berry size declining, prepare another area, if possible, for your new patch. Prepare to buy new, certified disease-free plants. Do not use runners from your existing planting to start a new one — these often contain viruses that will carry over to your new planting.
Renovating
June-bearing strawberries can maintain production for several fruiting seasons if they are well maintained. June-bearing plantings are invigorated and produce higher yield if they are renovated after fruit harvest. Renovation is a form of pruning. Do not renovate day-neutral or everbearing strawberries, which are still fruiting in late summer.
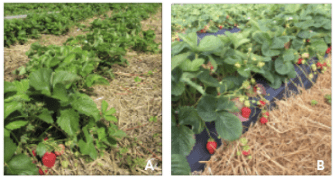
The best time to renovate June-bearing strawberry cultivars is about one to two weeks after the last fruit harvest (generally late-July or early August in the Willamette Valley). The goal of renovation is to remove the leaves without damaging the crown; these old leaves are tired after the four-week-long fruiting season, and plants will regrow faster by mowing. Mow the leaves to about 2 inches above the crown using a lawn mower or hand shears in small plantings or raised beds (Figure 18A). Cut high enough so you do not damage the crowns or basal growing points of the plants, as this would greatly reduce yield next year; leaving a portion of the leaf stem is fine. In small plantings, rake and remove the plant debris, which can reduce the incidence of fruit rot the following spring. After mowing, narrow the matted rows to about 10 to 12 inches wide by using a tiller or a hand hoe in smaller plantings. After mowing and narrowing the matted rows, fertilize (see “Established plantings”) and irrigate to encourage new leaf and runner growth (Figure 18B).
Runners will develop after the renovation process, and any that grow into the aisles are best raked into the matted row area just before the daughter plants root. This encourages them to root in the row rather than in the aisle and will increase yield the following year. Stop doing this by late summer (the beginning of September in the Willamette Valley), as these later-formed runners will not fruit the following year. In spring, you can remove them by cleaning up the aisles using a tiller or hand hoe (Figures 9B, 9C).
If you are renovating June-bearers grown in a hill system, mow off the leaves 2 inches above the crown, remove plant debris, fertilize and irrigate. Continue to remove all runners through fall.
Remove plantings that are not producing well or that lack vigor — generally after three or four fruiting seasons. During the last fruiting year, start a new planting using newly purchased, disease-free plants, in a new location.

Common problems
Weather-related issues
Strawberry plants adapted to your region are cold hardy, but frost could damage growing plant parts in late autumn or late winter to early spring. Also, in some winters, cold damage may occur when plants are not growing or are dormant. Plants may also be susceptible to bad weather during bloom, reducing pollination or fruit set.
Winter cold injury
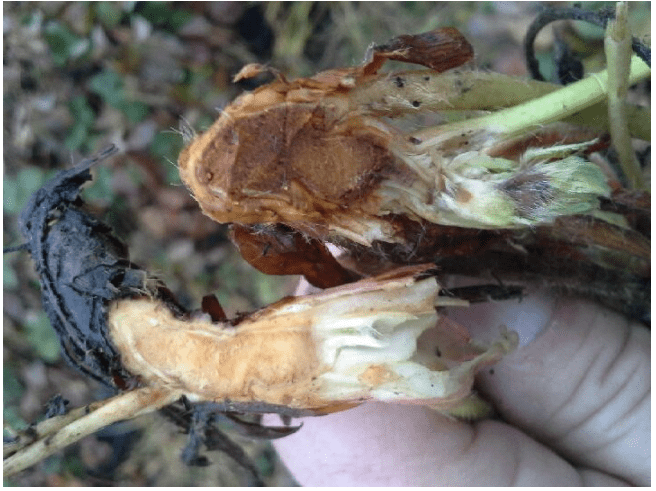
Strawberry crowns are damaged at temperatures from 10ºF to 20ºF (temperature at the crown), depending on the stage of plant dormancy and the weather preceding the freeze. Cold-damaged crowns will show symptoms of blackening after temperatures warm (Figure 19). Growth will be sporadic in cold-injured plants in the spring; when you see these symptoms, check crowns on weak plants for evidence of cold damage.
Choose cultivars that are adapted to your hardiness zone (see “Cultivars”) to minimize risk. In central, eastern and southeastern Oregon, cover plants with 2 to 3 inches of loose straw after temperatures first drop below freezing in fall. Remove the straw once the risk of severe cold has passed by raking it into the aisles (Figures 20A, 20B). Avoid placing straw on the plants too early or leaving it on too late in spring. Straw in these colder regions delays growth and flower emergence, reducing risk of frost injury to blossoms. Do not use straw mulch for winter cold protection in western Oregon or in other microclimates where there is considerable rain in winter; this will promote plant rot under the wet mulch. Strawberries grown in containers can be left outside for the winter in western Oregon, but should be moved inside if forecasts call for temperatures lower than 15°F.
In day-neutral plantings, carefully remove dead leaves in very late winter by cutting them off. Remove the leaves from the planting to reduce risk of fruit rot, because the fungus overwinters on these old leaves. Do not remove dead leaves earlier in winter, as they offer some degree of protection to the crown, reducing risk of cold injury in all regions of Oregon.

Frost injury
Frost will injure open strawberry flowers at 30°F; closed flowers may be damaged at 28°F. Frost-damaged flowers will have blackened centers and will not produce a fruit (Figure 21). Partial frost damage, often to the very tip of the flower’s center, will lead to a malformed berry, pinched in at the tip; these berries are often called “monkey faced.”
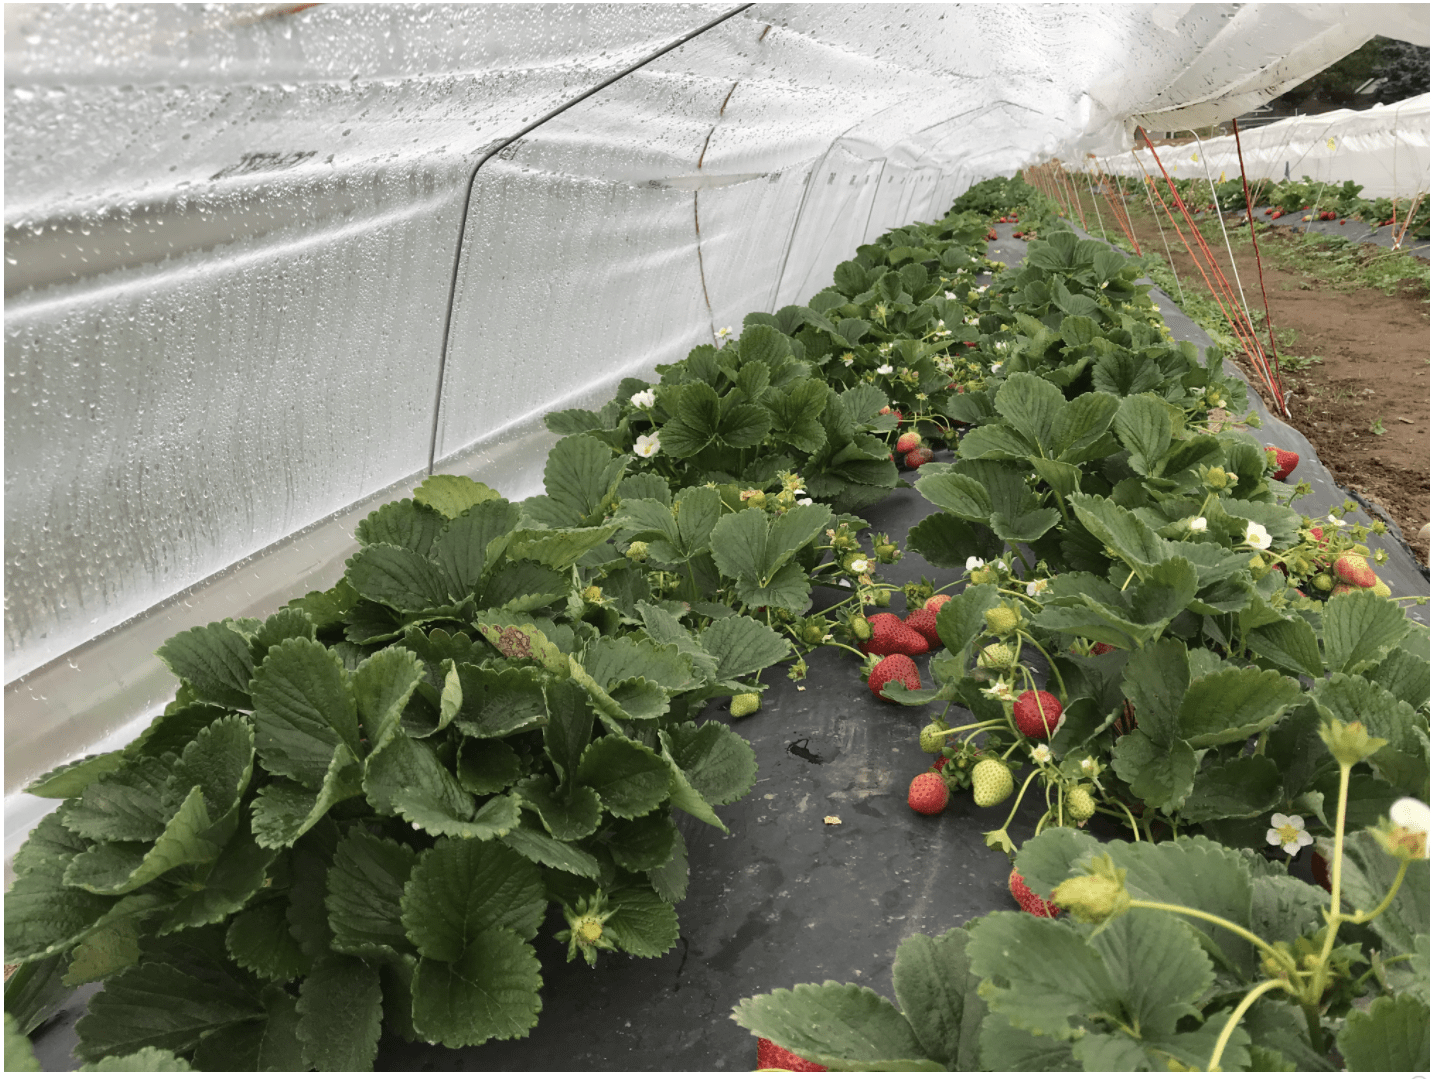
You can use row cover (also called floating row cover, frost cloth or spun-bound covers) to protect a planting in any region from frost injury to emerging or open flowers. In case a frost event is forecast during bloom, apply the row cover over the plants in the late afternoon or early evening to trap heat. Remove it in the morning after frost danger has passed. In spring, bring smaller containers inside if frost is forecast while plants are blooming. Use a row cover to protect raised bed plantings or larger containers. You can also use row covers in fall to protect plantings from frost. Low tunnels or greenhouses may extend the fruiting season of day-neutral cultivars (Figure 22). Be sure to open the sides when plants are flowering and when temperatures are above about 45–50ºF; this lets bees pollinate the flowers. Open them on warm days to improve ventilation. In a greenhouse, you will need to hand pollinate flowers using a paintbrush.

Poor pollination
Rain or cool weather during bloom can reduce fruit set by limiting pollination directly or indirectly through reduced bee activity.
Symptoms of poor pollination include grooved or pinched-in fruit (Figure 23).
Weeds and weed management
Weeds compete with strawberry plants for water, nutrients and light, so it is important to keep weeds out of the row. Strawberries are shallow-rooted, so cultivation must also be very shallow. Pull weeds by hand, especially around the base of the plants.
Hoe or cultivate no deeper than 0.5 to 1 inch around plants to prevent root damage. In new plantings, hoe or hand-pull weeds before they become established and to keep the soil loose, which will promote strawberry root growth and quick rooting of runners in the matted row system. The use of mulch in the row may help control weeds (see “Mulching”).
It is also important to manage weeds between the rows or the aisles, so that they do not spread into the strawberry plant row. Cultivate the aisles and keep them as bare soil, or mulch them with bark, wood chips or straw to discourage weeds.
For detailed information on specific weeds and weed control, see the Pacific Northwest Weed Management Handbook.
Vertebrate pests
Birds, deer, squirrels and mice can be nuisance pests for strawberries. If you are not able to fence your entire property or garden area, use row covers or netting to provide protection (Figure 6). Row covers are effective against birds as well.
Insect pests
Spotted wing drosophila
The most important insect pest in strawberry production in western Oregon is the spotted wing drosophila, or SWD. This pest is not commonly found in central, eastern or southeastern Oregon. This vinegar fly looks like a common fruit fly. The female lays eggs in developing fruit, generally after it first develops some color. The larvae feed inside the berry while the fruit is ripening (Figure 24).
Populations of SWD build up during the season, so late-fruiting cultivars (the second harvest of everbearers and later harvests of day-neutrals) are more prone to this pest. You can use fine exclusion netting to prevent adults from reaching the berries.
For more information on how to control and manage this insect, see “Resources.”

Strawberry crown moth
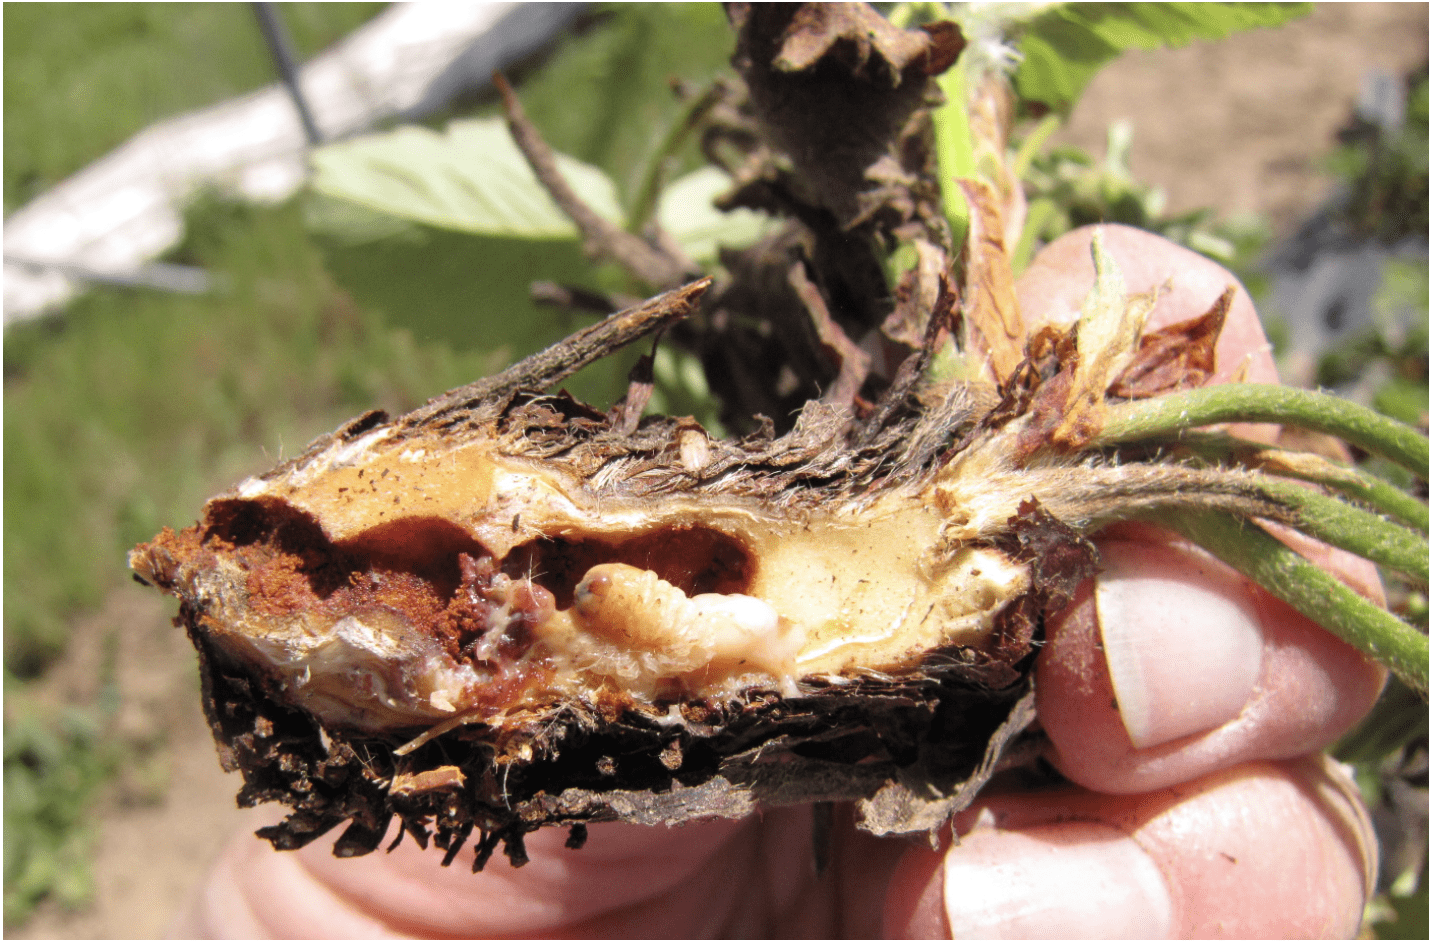
This pest is native to the Willamette Valley. The adult, a moth, resembles a yellow jacket wasp. Adults lay eggs on basal strawberry plant leaves in early summer. Eggs hatch into larvae that feed on roots and crown and ultimately bore into the crown, where they continue to feed (Figure 25). The larvae overwinter until they emerge as adults in spring. Plants become stunted and ultimately die.
On June-bearers, completely remove the old leaves at renovation to remove any eggs; foliage may be burned (if permitted) or composted. In everbearers or day-neutrals, remove infected plants in autumn and burn (if permitted) or otherwise destroy them.
Strawberry crown moth is not considered a pest in other regions of Oregon.
Black vine weevil
Adults feed at night on the edge of leaves, notching them, then they lay eggs at the base of strawberry plants. Eggs hatch and larvae crawl into the soil and feed on roots and crowns. They pupate and emerge as adults the following spring.
When you see evidence of feeding, confirm the presence of adults by inspecting the plants on warm, still evenings. Lay a small piece of cardboard next to the strawberry plant to provide a refuge that can be checked easily in the early morning. Kill all adults you find within a month of the first evidence of feeding damage.
Other insects that can be problematic in strawberries include symphylans, which feed on roots, and lygus or tarnished plant bug, which feed on fruit and can cause malformed berry tips in day-neutral cultivars in summer. Slugs, stink bugs and spittle bugs may also be a problem.
Check with your local Extension office for control recommendations, or see the Pacific Northwest Insect Management Handbook.
Diseases
Fruit rots
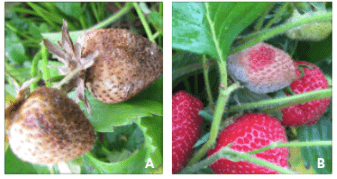
Strawberry fruit are susceptible to gray mold (Botrytis fruit rot), anthracnose fruit rot and leather rot. Botrytis overwinters on dead plant material. Maintain an open canopy by avoiding spring fertilization in June-bearers to help reduce the presence of this fruit rot. Other actions that may help include removing old leaves at renovation and cleaning old, overwintering leaves in early spring. Fruit rots are more likely to occur when it rains during bloom and fruit development. Both green fruit and ripe berries may be infected (Figures 26A and B). Remove and destroy diseased fruit as soon as you see it.
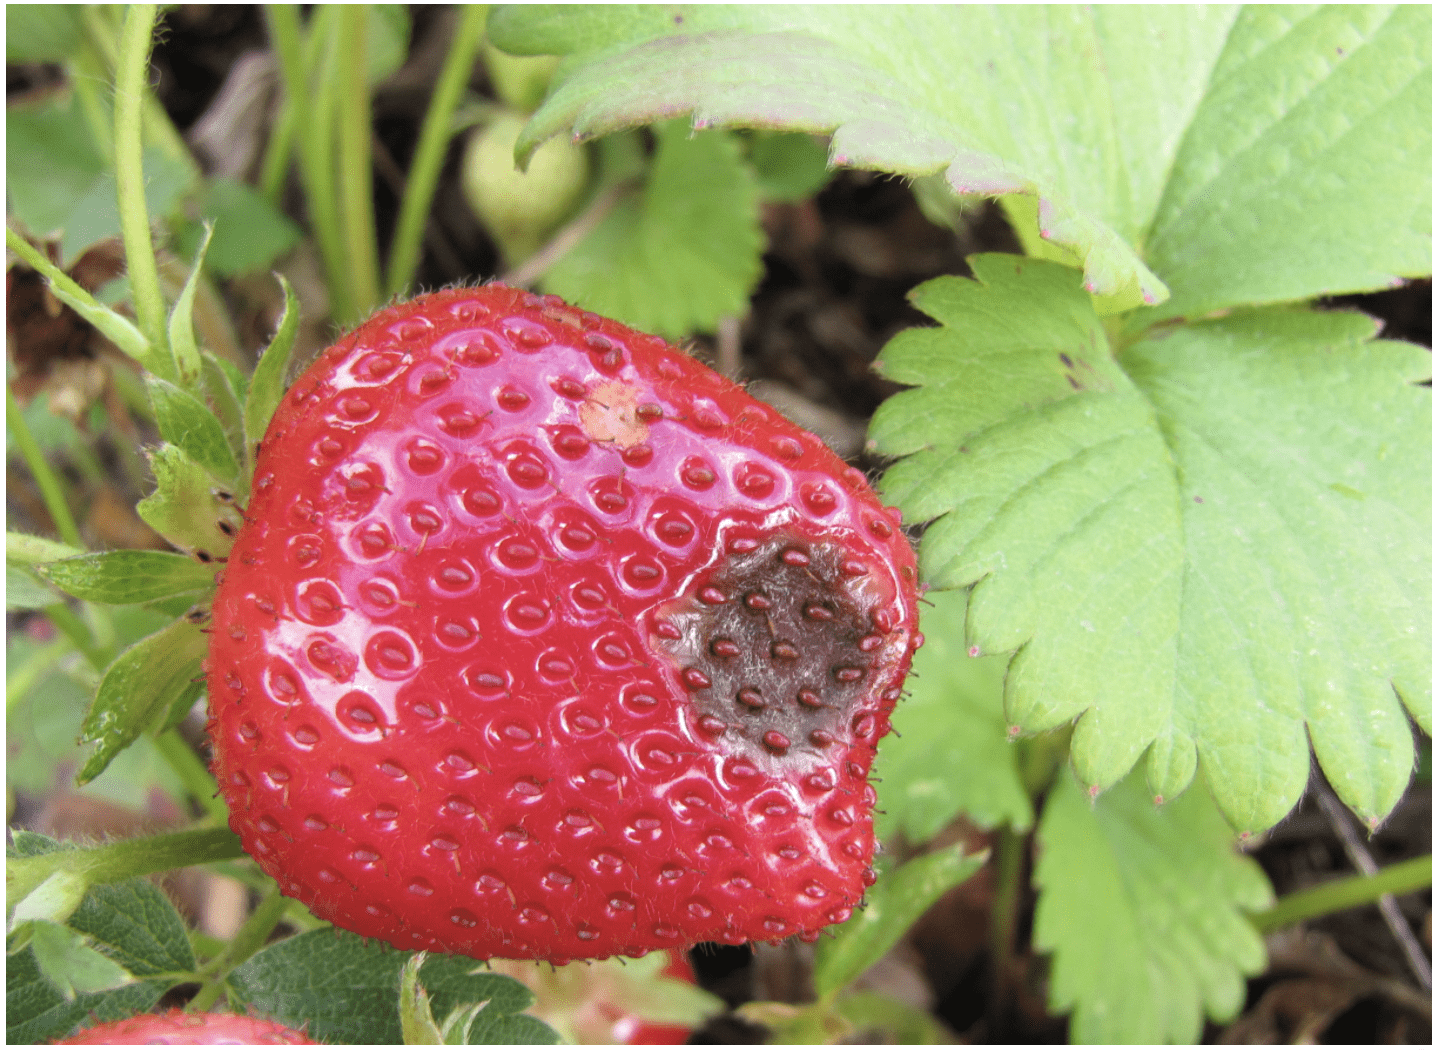
Anthracnose fruit rot is more prevalent in warm, humid or rainy conditions during fruit development. This disease can infect all plant parts, including the crown and runners. On fruit the rot is a dark, sunken circular area (Figure 27). Remove and destroy diseased fruit as soon as it is visible. Plants affected by crown rot will wilt and die. Buy only certified disease-free plants.

Powdery mildew
This fungus is commonly seen on strawberry leaves, which show upward cupping of leaf edges and purpling (Figure 28). In some cultivars, fruit may become infected; this disease causes the fruit to taste bitter.
Other diseases that can be a problem in strawberries include soilborne fungi that cause root rot and Verticillium wilt.
Crop rotation is an important tool for disrupting pest and disease cycles. For example, Verticillium wilt has many other hosts, including potatoes, tomatoes, peppers, eggplant, raspberries and blackberries, among others. Make sure strawberries do not follow or precede those crops.
If disease becomes an issue with your strawberries, check with your local OSU Extension office for control recommendations, or see the Pacific Northwest Plant Disease Management Handbook.
Resources
- Acidifying Soil for Blueberries and Ornamental Plants in the Yard and Garden, EC 1560
- Acidifying Soil in Landscapes and Gardens East of the Cascades, EC 1585
- Analytical Laboratories Serving Oregon, EM 8677
- Applying Lime to Raise Soil pH for Crop Production (Western Oregon), EM 9057
- A Detailed Guide for Testing Fruit for the Presence of Spotted Wing Drosophila (SWD), EM 9096
- Eastern Oregon Liming Guide, EM 9060
- Growing Berries on the Oregon Coast: Strawberries, EM 9178
- Growing Berries on the Oregon Coast: An Overview, EM 9177
- A Guide to Collecting Soil Samples for Farms and Gardens, EC 628
- Improving Garden Soils with Organic Matter, EC 1561
- Oregon State University Spotted Wing Drosophila information page
- Pacific Northwest Insect Management Handbook, Pacific Northwest Plant Disease Management Handbook, and Pacific Northwest Weed Management Handbook, revised and reissued annually
- Raised Bed Gardening, FS 210
- Selecting Berry Crop Varieties for Central Oregon, EC 1621
- Soil Sampling for Home Gardens and Small Acreages, EC 628
- Soil Test Interpretation Guide, EC 1478
- Strawberry Cultivars for Western Oregon and Washington, EC 1618
- Strawberry Nutrient Management Guide for Oregon and Washington, EM 9234
Use pesticides safely!
- Wear protective clothing and safety devices as recommended on the label. Bathe or shower after each use.
- Read the pesticide label—even if you’ve used the pesticide before. Follow closely the instructions on the label (and any other directions you have).
- Be cautious when you apply pesticides. Know your legal responsibility as a pesticide applicator. You may be liable for injury or damage resulting from pesticide use.