Perennials are one of the many treasures in the garden. These plants perform best when they are younger and have room to grow where they are planted, but in time they may outgrow their spot or lose vigor.
Don't despair! Even the oldest perennials can be rejuvenated by dividing the plant. Here are 10 tips on how to divide and when.
1. If a plant is looking good, it’s time to divide
If you have had a perennial in the ground several years and it is still looking top-notch, it is best to divide it at the end of the season before it starts going downhill in the coming seasons. Perennials are harder to divide once they have gotten too large, also if they have become so lackluster it is hard to rejuvenate them back to life. Watch for early signs of trouble such as weak blooming stalks in the center, fewer than normal flowers, or smaller leaves. If your plant is starting to show these symptoms it’s time to divide.
2. Dig around the root zone, not in it
To ensure minimal root damage, it is best to dig around the outermost drip line of the plant. Ceate a trench around the clump and then with a shovel go under the clump at several points until you can lift the perennial out of the hole.
To avoid damage to any new or current growth, divide early in the spring before growth really takes off or in the fall once you can cut the stems back.
3. Cool weather is better
You can divide most perennials at any time of the year. However the best time is when the soil temperature is staying warmer than the air temperature. This allows for a lot of root growth in the ground to get the division good and established before they set on a lot of top growth. Also, fall tends to be a preferred time to dig and divide because the new plants have more time to grow a new root system before the heat of summer.
4. Hold 'em cool and hold 'em moist
If you can’t get your divisions back into the ground right away, or into a container, it is best to hold the plants in an area where they stay cool and moist. They can be placed in a bucket or box in a cool, shady place and covered with newspaper to help prevent excess loss of moisture. If the roots happen to dry out before you get to replant them, we recommend soaking them in a bucket of water for about an hour to replenish their moisture before you transplant them back in the ground.
5. Put in what you take out!
If you take out a bucket full of soil, replace the bucket full of soil! Help maintain soil structure, fertility and nutrients by replacing the soil and perennial mass you moved with compost and organic matter. This will ensure that any transplants or new plants are off to a healthy start!
6. The best transplants are the most vigorous transplants
Once you have dug your clump and are ready to divide, it is best to divide your clump into about four to six sections depending on size. Perennials multiply fast — one stem can grow three or four times that size each season. By dividing into healthy, somewhat smaller divisions, you will get a more vigorous plant that will tend to have stronger growth and bloom the coming season.
7. If in bloom, be extra gentle
Some would say that you shouldn’t divide a perennial when it is in bloom, however it can successfully be done. Some plants such as early spring bloomers or fall bloomers will fare just fine if you keep the roots healthy and hydrated.
8. Healthy pieces are the way to go
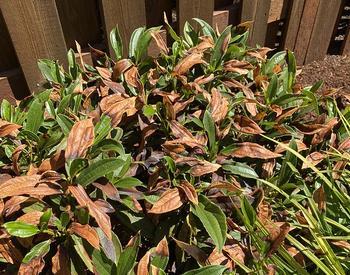
If you are dividing a perennial plant that is on the decline, ensure you only transplant healthy divisions. If you transplant divisions that are weak and declining, you could end up with a plant that is more susceptible to pests and disease. If a plant has become crowded and weak before you got around to dividing it, chances are the center section is what has been hit the hardest and the outer edges are the healthiest. Take divisions from the outer part, but be sure to watch for discolored stems and/or roots.
9. Give ‘em room to grow
When you replant your divisions, make sure your transplant's hole is as wide as its spread-out roots. With many divisions, it is easiest to make a mound in the hole in which to spread the roots over. This ensures that the tips are growing down as they would naturally and that your plant gets off to a running start.
10. Know your roots
Perennials can be grouped in to five basic root types. Before you divide, it is best to determine what root type you have (clumps/offsets, surface roots, underground running roots, taproots, or woody roots). This lets you know how to proceed with the dividing of the clump.
Root Types
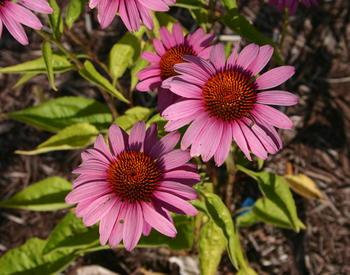
- Clumps/offsets: Perennials that form clumps or offsets (small plants that grow at the base of a larger plant) should be divided by snapping the connection between any of the sections. Make sure you get plenty of nice roots and at least three or more growing points. Examples of this type would be echinacea, asters, hosta, and coreopsis.
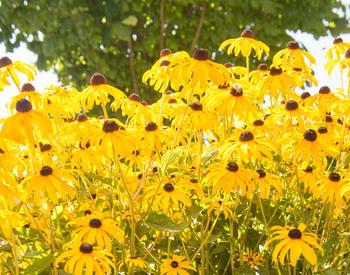
- Surface roots: Perennials with surface roots tend to run on or just below the soil surface. When the plant reaches an open space or new soil they form a crown and roots. These plants can be divided by simply cutting between and of the stems leaving you two separate plants with roots and shoots. Examples of these plants would be Sedums, Rudbeckia, and Monarda.
- Underground running roots: This type of root may also be referred to as a sucker. The ‘suckers’ can easily be cut away from the mother plant to be transplanted, or you can dig up the mother plant to separate into pieces with suckers already forming. Examples of these plants are geraniums and anemones.
- Taproots: Perennials with taproots can be divided quite easily using a knife. Think of them like a potato — you just want to make sure you get a good eye or two with some viable looking roots. Examples of these plants would be euphorbia and papaver.
- Woody roots: Perennials with woody roots tend to form roots when a woody portion of the plant rests on the ground or becomes slightly buried in soil. These plants can be divided by simply cutting between the newly rooted plant and the mother plant. Examples of these plants would be candytuft, lithodora, phlox, and lavender.
Some information sourced from: Fine Gardening. September 2010.