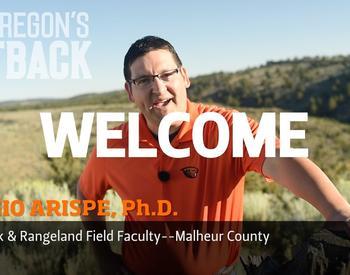
Transcript
Hi, and welcome to Oregon's Outback.
Today, you're going to learn the step-by-step process
on how to photo monitor.
This is going to encompass all three
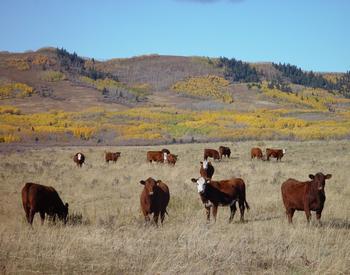
areas of sustainable rangeland-based beef
production.
That is, practices that are environmentally responsible,
economically viable, and socially diligent.
Dustin, would you take us through the process
on how to rangeland monitor?
Sure, Sergio.
I'd be happy to do that.
First, I just want to talk a little bit
about rangeland monitoring.
So rangeland monitoring is documenting or measuring
how conditions of your land and/or vegetation
are changing in response to the environment and the management
that you're applying, and then periodically evaluating
the change in those conditions relative to your management
objectives.
In addition, and just as importantly, monitoring
is also a tool that can be used to understand what changes
might be needed in your management program
to make sure that you're making progress in meeting
those management objectives.
So, Dustin, is rangeland monitoring complicated?
No, not at all.
Rangeland monitoring does not have to be complicated.
In fact, periodically taking photos
in a consistent manner of the same locations
at the same time of year can serve as a highly effective
monitoring program.
Now, there are many ways of conducting photo monitoring,
and I plan to show you just one of those methods today
that I find simple and highly repeatable.
Before establishing a long-term photo monitoring plan,
gather all the equipment you'll need to document the site
and to collect the photos.
Your equipment list should include
a digital or film camera--
a cell phone can also work in a pinch--
a photo board; rebar or galvanized landscape
spikes, to permanently mark the plot; point; a hammer; paper
or notebook and pencil, for taking
field notes about the site; a set of 6-foot carpenter rules;
and a GPS and/or map to mark the location of the photo point.
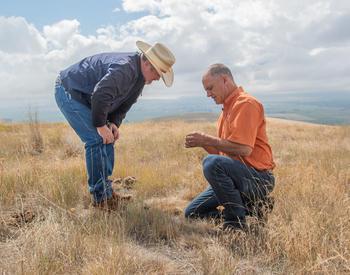
So once you've selected a site to photo monitor,
the next step is to permanently establish the photo point.
The method of photo monitoring that I'll be demonstrating
involves two photos at each site.
So you'll establish a 3- by 3-foot photo plot
with your two 6-foot carpenter rules.
The ground photo plot serves two purposes.
First, it shows a closeup of the vegetation you are managing,
and provides detailed documentation
of how that vegetation changes over time when
you revisit the site to take photos in the future.
Therefore, it is important to place the 3- by 3-foot photo
plot so that shows the key plant species that
are relevant to your management objectives.
For example, on this site I would likely
have as at least part of my management objectives
something about maintaining the abundance and production
of my large deep-rooted perennial bunch
grasses, such as the bluebunch wheatgrass that we see here.
Therefore, I would want to include
some bluebunch wheatgrass plants in my 3- by 3-foot photo plot,
so that I will have detailed documentation of how
the abundance of these important grass plants
might be changing over time.
Once you have your carpenter rules placed
where you'd like them, mark the two diagonal corners
with either rebar stakes or landscape spikes.
That will help you place the plot in the exact same place
in the future.
The second purpose of the 3- by 3-foot ground photo plot
is to serve as a place to stand when
taking the landscape photo.
Therefore, while I'm down here, I also
like to mark where to stand when taking both the ground
photo and the landscape photo.
It is important to mark this location
on the north side of the plot if possible,
to prevent casting a shadow in your photos.
Next, fill out your photo board with the location, pasture
name, date, and GPS coordinates, if possible.
Place the photo board so that it will
appear in the ground photo.
Now move the photo board so that it will
appear in the landscape photo.
When taking the landscape photo, it
is important to orient the photo so that a permanent reference
point appears, preferably in the center of the photo's
background.
This reference point will greatly
aid framing the photos consistently over time.
Select a photo point that is truly permanent, such as a rock
formation, mountain peak, or other permanent landscape
feature, and describe the reference point
in your site notes.
And as tempting as it may be, try
to avoid selecting reference points that are
less persistent, such as trees.
To create consistent landscape photos,
try setting the camera on top of a 5-foot PVC pipe that
is an inch in diameter.
It will provide for easier comparisons in later years,
especially if different individuals will be taking
landscape photos over time.
Now take your landscape photo.
In one quarter of the photo should be sky,
and 3/4 of the photo should be landscape.
For future repeat landscape photos,
I found it handy to bring along photos from the previous years,
so that I can refer to them when trying
to frame up the current photo.
Again, photo monitoring is simple and highly repeatable.
The only trick to it is remaining
as consistent as possible in how and when you take the photos.
If you have a GPS unit, collect the coordinates of the 3-
by 3-foot ground photo plot.
Even better would be to collect a waypoint at the plot
and name it with the site location,
so it can be placed on a map later.
Lastly, take notes about the site and the conditions
you observed while monitoring.
Notes can include details on the specific location where
the photo was taken, the weather that had occurred that year,
information about grazing, the presence of weeds on the site,
wildlife use, evidence of fire, and
any other relevant observations you make on the site.
Remember, the more notes you take, the more complete
the story you'll have about how and why things
are changing on your rangeland.
So now that you've taken your photos and field notes
on this site, it will be important
for you to keep all this information
secure and organized, so that you can easily
locate it and evaluate it when you need it in the future.
Therefore, when you get back home, download or print
your photos, and type up or scan your field notes
on your computer, and organize your field notes,
photos, and other information in a notebook while everything
is still fresh in your mind.
Keeping both electronic and hard copies of your monitoring
information is a good practice.
In addition, the notebook, depending on its size,
can easily be taken to the field when
monitoring sites in the future.
There are many ways to monitor rangeland.
I've only shown one method of photo monitoring
in this segment that I found to be easy to undertake,
highly repeatable, and meaningful for helping
me to understand if I'm making progress in meeting
my management objectives.
The bottom line is, no matter what type of monitoring method
is selected, the best type of monitoring
is the one that gets done, and the one
that is used to determine the effectiveness
of your management.
Therefore it is important to select a monitoring program
that you can accomplish and commit to using to support
your management decisions.
Thank you, Dustin.
If you have any questions on how to photo monitor,
please contact your local extension agent.
Until then, we'll see you on Oregon's Outback.
[MUSIC PLAYING]
Rangeland monitoring does not need to be complicated. Periodically taking photos in a consistent manner of the same locations at the same time of year can serve as an effective monitoring program. There are many ways of conducting photo monitoring, and in this video you will learn one method that is simple and highly repeatable so you can establish your own photo monitoring sites.
What more information? In this article, learn more about this approach and one other method that stands out for being easy to use, efficient, repeatable and effective.

Want to learn more about this topic? Explore more resources from OSU Extension:
Rangeland conservation and management