Bulbs bring spring beauty to your garden. But Central Oregon gardeners may want to take steps to keep frost from damaging the flowers. Here’s what to know about buying, planting and caring for flowers that grow from bulbs.
Purchasing
Here are some tips for purchasing your blubs:
- The size of the bulb correlates directly to the size of the flower. The bigger the bulb, the bigger the flower.
- Look for healthy bulbs, avoiding any mechanical damage or mold.
- You may also want to purchase a bulb digger, soil amendment and fertilizer.
Site selection
Most bulbs prefer full sun and well-drained soil. You may want to mix your bulbs with other perennials so that when the bulbs finish blooming, the perennials will follow and conceal the dying foliage of the bulbs. Also, consider early-, middle- and late-spring blooming bulbs, so you have color the whole season. Plant masses of a single color rather than mixing colors throughout your bed. Be careful of plantings on the south side of the house, especially those near the foundation. Sometimes, the extra heat generated by the home can induce earlier blooming and cause frost damage to your bulbs.
When to plant
The best time of year to plant in Central Oregon is the end of September through October. You want to ensure the bulbs become well rooted (allow two to three weeks) before the ground freezes.
Preparing the site
Plant bulbs at various depths depending upon the species (see table). As a general rule, plant bulbs four to five times the height of the bulb, measuring between the tip of the bulb and the top of the soil. Be sure to plant the growing tip (pointy side) up. Add organic matter from one-third to one-half of the native soil you remove when you dig the hole for your bulbs. If possible, excavate the bed to the level at which you will plant the bulbs. Add the soil amendment and fertilizer (superphosphate) to the bed at this time, and rototill to a depth of three to four inches. If you cannot excavate, dig the holes individually and amend them with soil and fertilizer at the appropriate depth. Phosphorous fertilizer does not move through the soil. Apply fertilizer at the time of planting so it will be most available to the roots. Water in well. Once the ground is frozen, cover the bulbs with approximately 3 inches of mulch to keep them from freezing and thawing.
Follow up care
Once your flowers begin to wither, you’ll want to cut them off. Otherwise, seed production will occur, taking some of the food sources away from the bulbs for next year. However, you do want to allow the foliage to die back naturally. The leaves use sunlight to produce food stored in the bulb for the following year.
| Flowering Bulbs | Recommended planting depth from tip to soil surface (inches) | Minimum Spacing (inches) | Bloom Time | Deer-Resistant |
|---|---|---|---|---|
| Snowdrops - Galanthus | 3-4 | 3 | Early spring | X |
| Windflowers - Anemone | 2-3 | 2-4 | Early spring | |
| Crocus | 4 | 4 | Early spring | X |
| Scilla | 4 | 4 | Early spring | X |
| Tulips- early | 6 | 6 | Early spring | |
| Daffodils | 6-7 | 6-8 | Spring | X |
| Grape Hyacinth | 4 | 3-4 | Spring | X |
| Tulips | 5 | 6-8 | Spring | |
| Fritillaria | 3 | 6-8 | Spring | X |
| Hyacinth | 4 | 6-8 | Spring | |
| Tulips- late | 7 | 6-8 | Late spring | |
| Dutch Iris | 4 | 4-5 | Late spring | X |
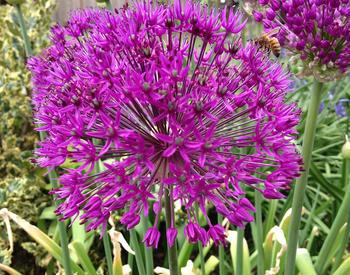
| Allium | 1-2 | 6-8 | Late spring/summer | X |
| Giant Allium | 2-3 | 12-18 | Late spring/summer | X |
