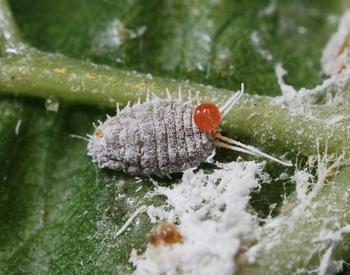
The proper way to pin an insect depends on the type of insect that you have collected. Alert! soft-bodied insects such as scales, caterpillars, mayflies, silverfish and others cannot be pinned.
The correct way to pin various orders of insects is shown below. Note that the pin is usually just slightly to the right of the midline of the insect (second segment of the thorax). The use of a pinning block will help in obtaining proper height and positioning.
- Step 1: Place the pin in the insect thorax in the right position on the top step of the pinning block. Push the pin gently as far as it will go.
- Step 2: Position the collection label on the middle step.
- Step 3: Position the insect identification label using the lowest step. Very small insects (less than The location of the black spots show the location of the pin 2 | WSARE – “Train the trainers”- Handout 3/16 inch) should either be pinned with “tiny needles” or glued on their right sides to tiny paper triangles. The latter procedure is called pointing. Pick up the small insect carefully with forceps and mount it by touching it on its thorax (right side) to the drop of glue. Adjust the insect so that it remains squarely in position, then allow the glue to dry. You can also use nail polish instead of glue. Pins # 2 or 3 should be used.
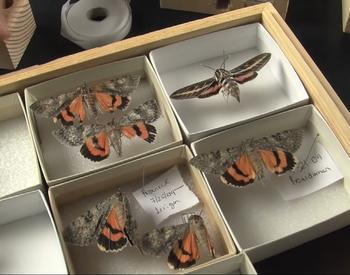
Pinning and spreading butterflies and moths
- Insects with large wings, such as butterflies, moths, and dragonflies, can be temporarily stored and dried in paper triangles until you have time to relax, pin and spread them.
- Remember: before trying to pin them, the specimens must be relaxed.
- Start the pinning and spreading process with several thin strips of paper about 1/4" wide and 8"-10" long, spreading board pins # 2 or 3, tweezers, and PATIENCE. The more you practice the more skillful you will be.
- Begin by picking up the insect by the thorax and carefully pushing a pin through the middle of the thorax.
- Adjust the position of the butterfly on the pin and make sure it is level.
- Place the pin into the hole in the tallest step of the pinning block.
- Be careful not to damage the fragile wings.
- If you use more than 5 minutes to pin a butterfly, forget it, and get another specimen (some exceptions apply).
- Practice with common butterflies before using the “rare” ones.
- Slip a paper strip between the wings (if they are upright) and use it to force the wings on one side down into position.
- Pin the ends of the paper down to hold the wings loosely in place. Do the same with the wings on the other side, also pinning the ends of the paper down.
- A “perfect” work will leave the rear edge of the two forewings in a perfectly straight line across the back.
- The hind wings should be pinned so that the rear edge is held just slightly away from the abdomen.
- Position antennae with pins and if the abdomen has drooped, prop it up with pins so that it dries in a natural position.
- Allow specimens to dry for several days before you remove the pins.
A collection has little value unless each insect is properly and accurately labeled. Labeling must be done as soon as possible after collecting, pinning, and mounting, or vital information may be lost. Labels can be created on the computer and printed, or if you have good penmanship handwriting is acceptable, but use a fine pen.
Two labels should be placed on the pin below each insect specimen. Both labels should be of the same size and lined up parallel to the length of the body of the insect (not cross-wise). In the case of "pointed" specimens, the labels should be parallel to the length of the point. The top label should have the county and state in which the insect was collected, the collection date, and the name of the collector. The middle label should show the Order name of the insect.
Oregon State University Extension Service offers educational programs, activities, and materials without discrimination based on age, color, disability, gender identity or expression, marital status, national origin, race, religion, sex, sexual orientation, or veteran’s status.