Transcript
Welcome to part 2 of Scheduling Irrigation with a Pressure
Chamber.
I'm Dr. Alexander Levin, a viticulturist
with the Department of Horticulture
and core faculty member of the Oregon Wine Research Institute
at Oregon State University.
Now, before we make an actual measurement,
let's take a look at some of the key features of the instrument.
This is the actual chamber, the lid that seals it,
and the compression screw that seals off
the petiole from the outside air.
Over here is the compressed gas tank and its connection
to the chamber.
There are two gauges on the front of the instrument.
One gauge indicates the pressure in the chamber.
And the other gauge indicates the remaining pressure
in the tank.
Here is the main control valve that allows gas
to flow into the chamber and exhausts
the chamber when we're done with the measurement.
The rate valve controls the gas flow rate
into the chamber during pressurization.
The safety valve automatically releases gas
from the pressurized chamber if the chamber pressure
were to ever exceed the safety limits of the instrument.
If you are measuring leaf water potential,
you'll need a regular sandwich bag.
But, if you're measuring stem water potential,
you'll need an opaque aluminum bag.
I'll discuss the differences between the two measurements
in a moment.
You will also need a few other items, including a sharp razor
blade, a magnifying glass, and, of course, paper and pencil
to record the information.
So the best time of the day to make a measurement
is at midday, usually between 12:30 and 2:00 PM.
And this is also called solar noon.
This is the time when the sun is the highest in the sky
and when the plants are most stressed for water.
It's also the time when the water potential value
is changing very slowly.
Selecting a Vine
When you're ready to make the measurement,
you should select vines that are representative
of all vines in the block.
Avoid using vines that are growing at row ends,
end rows, or vines that are overly weak, too vigorous,
or that are diseased.
Once you've chosen your vine, you
must decide what kind of measurement you want to make,
leaf water potential or stem water potential.
Both measurements are highly correlated to each other.
And both give you an idea of the vine's water status or,
in other words, how wet or dry the vine is.
Both measures are also highly correlated
to many other aspects of vine physiology.
So, in the end, you should choose the measure
that you feel most comfortable with.
Leaf vs Stem
Now don't let the name of these measurements fool
you, as both leaf and stem water potential measurements
use leaf samples.
The main difference between the two measurements
is how long the leaf is covered by the bag.
However, as I suggested, both are
very indicative of the plant's level of water stress.
Leaf water potential measurements
use leaf samples that are mature and fully sunlit
and are generally located in the middle of the shoot.
The technique requires bagging the leaf
with a plastic bag just prior to excision from the plant.
Leaf water potential measurements
are quicker to make.
But they are potentially more prone
to operator error compared to stem
water potential measurements.
Stem water potential measurements
use the same kind of leaf samples
as for leaf water potential.
However, the technique requires bagging
the leaf with an opaque Mylar bag
at least 30 minutes before sampling.
Bagging the leaf stops transpiration,
allowing the leaf's water potential
to come into equilibrium with the water
potential of the stem, hence, the name of the measurement.
Stem water potential measurements
tend to be less variable between operators.
But they require more time to make a measurement.
And sometimes it can be difficult to locate
the pre-bagged leaves in the vineyard.
Selecting a Sample
So, to measure leaf water potential,
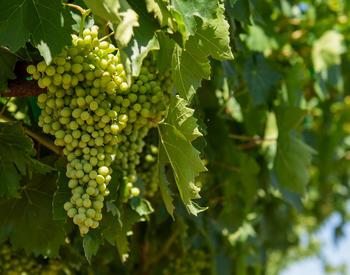
you want to choose a leaf sample that's
fully expanded and mature and located
about in the middle of the canopy and exposed to the sun,
like this one here.
You also want to make sure that the leaf
sample is free from any sort of damage or disease.
For stem water potential measurements,
you want to have the sample be the same kind as for leaf water
potential.
But you want to make sure that it's bagged
prior to the measurement.
And we've already selected and pre-bagged one right here.
Note that the technique is the same for both measurements.
The only difference is how long the leaf
is bagged before you measure.
Once you're ready to make a measurement,
bag the leaf and use the razor blade
to cut the leaf off of the shoot,
leaving as much petiole tissue as possible attached
to the leaf.
Next, bring the bagged leaf to the instrument immediately.
Put the bagged leaf into the chamber lid
so that the petiole only protrudes about half an inch
and tighten the compression screw.
Then carefully put the bagged leaf in the chamber
and lock down the lid.
Open the control valve to the chamber position
and slowly open the rate valve to let gas into the chamber.
Note the pressure gauge showing the increase
in chamber pressure.
As you increase the pressure, use the magnifying glass
to view the cut surface of the petiole.
Making a Measurement
Close the chamber valve at the first sign of water
appearing at the cut surface.
This is called the endpoint.
Record the pressure shown on the chamber gauge.
To get an accurate reading, it is
important to increase the pressure slowly so you do not
overshoot the endpoint.
Using the rate valve, increase the pressure
at about one bar per second until you
get within two bars of the endpoint.
Then increase at half a bar per second
until the endpoint is reached.
After you've made a few measurements,
you'll get a feel for where the endpoint is
and get a sense of when you're within two bars.
Before taking any official readings,
practice with a few dummy leaves first.
Also, because the operator can be the largest source of error,
it's advisable to have a dedicated operator making
measurements if possible.
Now let's discuss some potential errors and problems
when making a measurement.
One of the largest sources of error in leaf water
potential measurement results from not bagging the leaf prior
to removal from the plant.
When the leaf is removed from the plant,
it loses water very quickly.
And that can affect your reading.
In addition, when the leaf is placed into the pressure
chamber, it is heated during pressurization, which
can also affect the reading.
Removing the Leaf
It's important to make the measurement rapidly yet
precisely.
As I just said, the leaf can lose water quickly
once you remove it from the vine.
For that reason, it's important to remove the leaf within two
seconds of bagging and to pressurize it
within 15 seconds of removal from the vine.
For this reason, it's important to not collect
a bunch of samples and bring them back to your truck,
but rather to bring the instrument with you
into the field.
And an ATV or some sort of farm vehicle can help you do that.
Broken Leaf
Sometimes the leaf can be broken when
it is put into the chamber.
And, when pressure is applied, air
is forced through the water in the xylem
and causes bubbling at the cut surface.
This can make it difficult to detect the endpoint.
If this happens, you can stop the pressurization
and exhaust the chamber immediately,
which will cause the sap to return into the leaf.
Then dry the cut surface with a dry cloth or Q-tip
and restart the pressurization.
If making leaf water potential measurements, as opposed
to stem water potential, where you
have to wait for equilibration, it's
better to just get another leaf sample.
If the bubbling starts again with your original sample,
you are likely at or have missed the endpoint.
Remember, at the correct endpoint,
the xylem sap should just wet the cut surface
and not form a lens or hemisphere of water.
The importance of slowly reaching the endpoint cannot be
overemphasized.
Cut End
The appearance of non-xylem water at the cut end
also can make it difficult for you to detect the endpoint.
This may occur when you are tightening
the seal on the chamber lid and accidentally
squeeze the petiole, causing water
from the outside of the xylem to be forced out.
For this reason, it's important not to overtighten the seal
around the petiole.
In addition, keep as much of the petiole inside the chamber
as possible.
Leave only enough tissue outside of the chamber
so that you can see the cut surface.
Leaf Anatomy
It also helps to be familiar with the basics of leaf anatomy
so that you can be sure the water you see
is coming out of the xylem and not the phloem.
Luckily, grapevines have large and easy to distinguish
vessels.
And they also don't exude any resins.
So it's easy to pick out the xylem from other tissues.
Finally, only use compressed nitrogen
to make measurements, not air or CO2, which
can affect leaf physiology and confound the water potential
value.
Make sure your gaskets and grommets are in good condition
to make the seal, both at the petiole
and at the chamber lid itself.
In general, it's good practice to have your pressure
chamber professionally recalibrated
before each field season.
How Many Measurements
So the question is how many measurements
should you make per vine?
When you're first starting out, it's
a good idea to make about a couple
of measurements for each vine.
If the two measurements are within about a bar
of each other, then you can move on.
If they're not within a bar of each other,
then it's good to make a third measurement for that vine.
And then the question becomes how many measurements do
you make per irrigation block?
It's a good idea to choose about three
to five representative vines for that irrigation block.
And then, once you get a good idea
of the water status of those vines,
then you can move on to the next block.
So let's see what this process looks like in real time
from start to finish.
Additional Tips
Here are some additional tips with interpreting
the measurements.
Leaf water potential measurements
give you lower, or more negative,
values than stem water potential measurements,
usually by about one to two bars.
Leaf water potential values higher, or less negative,
than negative 10 bars are considered non-stressed.
Between negative 10 and negative 12
is considered mild stress, between negative 12
and negative 14, moderate stress.
And negative 14 or lower is considered severe stress.
Stem water potential values higher than minus 8 bars
are considered non-stressed.
Between minus 8 and minus 10 are mild stress.
Between minus 10 and minus 12 are moderate stress.
And minus 12 or lower is considered severe stress.
Outro
Thanks for watching, everyone.
And, if you have questions about any of these techniques,
please visit our website site at owri.oregonstate.edu, where
you can find my contact details as well as
a bunch of other information related to viticulture.
Thank you.
Step by step instruction on how to use a pressure chamber as a tool to help you schedule irrigation in wine grape vineyards. Dr. Alexander Levin walks through the steps of using a pressure chamber to measure leaf water potential and stem water potential. Part 2 of 2 Oregon Wine Research Institute
Catalog - PNW 713

